• Skip to main content
  • Skip to header right navigation
  • Skip to site footer
  • YouTube
  • MakerWorld
  • Instagram
  • Threads
  • Bluesky
  • Mastodon
  • Facebook
makerhacks-logo

Maker Hacks

Ideas, news & tutorials for makers and hackers – Arduino/Raspberry Pi, 3D printing, robotics, laser cutting, and more

  • Home
  • About
  • 3D Printing
  • Laser Cutting
  • CNC
  • Programming
  • Free Arduino Course
  • Free Robotics Course
  • Recommendations

Playing with Grove – LCD Displays

You are here: Home / Electronics and Hardware / Playing with Grove – LCD Displays
Author: Chris Garrett
Grove i2c LCD
Grove i2c LCD

Recently I have come around to really enjoy the Grove sensors and displays from Seeed. They are so convenient!

Grove uses a 4-pin cable to make attaching and removing the addons crazy simple. You can’t even plug them in the wrong way!

You don’t have to worry about voltages, and they each have Arduino libraries. Unfortunately, right now I have found the ESP8266 support spotty. Will keep working with it.

Now, you don’t HAVE to use Arduino. I also have a Raspberry Pi board to try out.

Grove I2C LCD Displays

Today I wanted to share the two LCD displays that I have been testing.

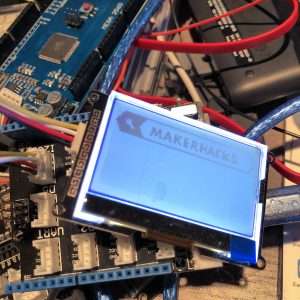
The one pictured above is a straight graphical display. It comes with a nifty tool allowing you to convert a bitmap into C code. Of course, I had to convert my logo :)

If you only have a line or two of text, this RGB backlit display is lovely.

Seen here displaying Hello World along with a randomly coloured background.

Arduino C Code

// libraries for i2c and the specific display
#include <Wire.h>
#include "rgb_lcd.h"

rgb_lcd lcd;

void setup() {

    // make sure the random is random
    randomSeed(analogRead(0));
    
    // set up the LCD's number of columns and rows:
    lcd.begin(16, 2);
    
    // Print our message to the LCD.
    lcd.print("hello, world!");
}

void loop() {
  
    // Turn off the display:
    lcd.noDisplay();
    delay(500);
  
    // Turn on the display:
    lcd.display();

    // Random colours
    int colorR = random(255);
    int colorG = random(255);
    int colorB = random(255);

    lcd.setRGB(colorR, colorG, colorB);
    delay(500);
}
Category: Electronics and HardwareTag: arduino, c programming, esp32, esp8266, Makes, making, raspberry pi, software

About Chris Garrett

Marketing nerd by day, maker, retro gaming, tabletop war/roleplaying nerd by night. Co-author of the Problogger Book with Darren Rowse. Husband, Dad, 🇨🇦 Canadian.

Check out Retro Game Coders for retro gaming/computing.

☕️ Support Chris on Ko-Fi to get exclusive content and rewards!

Previous Post:Kano PixelKano Pixel Review
Next Post:How to Automagically Create Thumbnail Images Using Pythonthumbnails with python

Sidebar

  • Facebook
  • Instagram
  • YouTube

Featured Posts

  • CyberBrick Review + Getting Started
  • xTool M2 Review
  • xTool F2 Ultra Review
  • xTool F2 Review
  • xTool S1 Review
  • Anycubic Kobra S1 Combo Review
  • Makera Z1 Pro Review
  • CNC Buyer's Guide
  • eufyMake E1 UV Printer Review
  • eufyMake Purifier P1
  • Z80 on a Breadboard
  • OpenSCAD MakerWorld Customizer

30 Days to Arduino

Arduino Tutorials
  • 3D Printing
  • CNC
  • Electronics and Hardware
  • Laser Cutting
  • News and Reviews
  • Software and Programming

arduino budget cad cnc diode laser glowforge Hacks Ideas laser cutter linux Makes making python raspberry pi Reviews technology tips xtool xTool Lasers

  • YouTube
  • MakerWorld
  • Instagram
  • Threads
  • Bluesky
  • Mastodon
  • Facebook

.

Maker Hacks Blog Copyright © 2026 · All Rights Reserved · Privacy Policy