
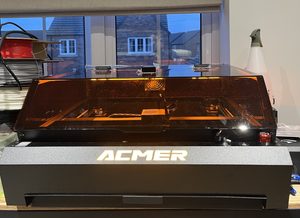
The ACMER P3 is a 48W diode laser, in a compact form factor, for a reasonable price. It’s controlled by LightBurn, and has a nice camera for visually laying out your design. What’s not to love?
I was sent this laser by ACMER to review, and though I paid the UK import tariff myself, they sent it for free for me to objectively review. I’m enrolled in ACMER’s affiliate programme, but otherwise it is not a paid review, and ACMER has not seen this before publishing.
It’s taken me 16 months to write this review. That is my fault, not theirs, and it means this is a long-term look rather than a launch day quick test.
Bottom line, before we get into the details, is it is a great laser that we have used as our rubber-stamp engraving and cutting workhorse.
But there is one problem that caused me a lot of frustration that we need to get out of the way. It would have been given a pass a few years ago, but it might be a show-stopper for you now.
No WiFi
My main gripe: because of the dirt and fumes, it must* live where the fume extraction hose can reach a window. My desk is on the other side of the room. No WiFi means I have to either tether it to a laptop or run a long USB cable across the floor between them.
* ACMER do sell an air purifier as an optional extra, but it adds to the price, and it would soon clog up cutting rubber and other dirty materials.
When I tried the latter I had to duck under it every time I crossed the room, and I am not as agile as I once was, not that I was ever all that graceful.
As expected, the USB connection kept dropping. Each time, my Mac would not see the laser again until I moved the cable to a different port and started over.
LightBurn streams the job over USB from start to finish, so a dropped cable mid-job is a ruined piece, not just a simple pause in the action.
My rule from now on is to prioritise machines that connect over WiFi.
A laser cannot sit beside my desk, because extraction decides where it goes. The xTool C1 has WiFi. My Silhouette Cameo 5 Alpha only has Bluetooth for wireless connectivity, but that is fine, because a vinyl cutter has no fumes and lives close enough to the computer for Bluetooth to reach.
Weird thing, the ACMER P3 does have WiFi, but only a hotspot for ACMER’s phone app.
ACMER P3 Specs
| ACMER P3 48W | |
|---|---|
| Machine size | 577 x 655 x 286 mm |
| Work area | 400 x 390 mm (the 24W and 2W IR versions get 400 x 400 mm) |
| Weight | 19 kg |
| Laser | 48W diode, switchable to 24W |
| Focal length | 8 mm |
| Motion | CoreXY, two steppers, no motor on the gantry |
| Max speed | 48,000 mm/min (Steve Makes Everything’s figure; not in the manual) |
| Claimed accuracy | 0.01 mm |
| Camera | in the lid, 5 MP (Steve Makes Everything’s figure; not in the manual) |
| Power input | DC 24V external adapter |
| Connection | USB, the machine’s own WiFi hotspot for the phone app, TF card |
| Software | LightBurn, LaserGRBL (Windows only), ACMER Studio, MKSLaser phone app |
| Frame | aluminium profile |
| Safety | enclosed, lid pauses the job, key safety lock, emergency stop button, flame detector |
| Air assist | external pump in the box (not on the 2W IR version) |
| Extraction | rear exhaust fan with outlet, exhaust pipe and hose clamp in the box |
| Price | $1,049 on acmerlaser.com at the time of writing, vs a claimed regular price of $2,299 |
Check out all the details about the ACMER P3 on the ACMER store
There are several laser modules, all sold separately: 48W diode (switchable to 24W), 24W diode, 2W IR for metals, and a 2-in-1 with a 10W diode and 2W IR in one head (5 mm focal length, the 2W IR is 23 mm).
What it’s like
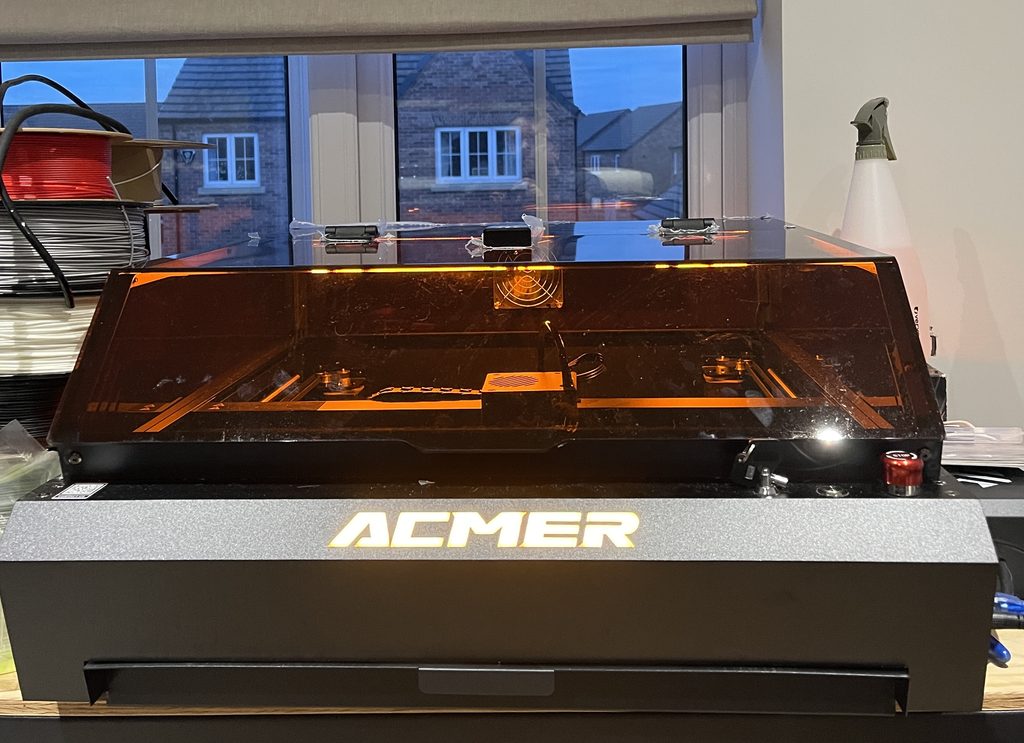
Around the machine are the emergency stop, lock key, an LED switch, fan switch, camera port, rotary (roller) port, TF card slot, air pump power and hose, and a slide-out drawer-style crumb tray. This means you can remove the base, though I did not try that for the safety of my worktop.
In the box as well as the machine and your chosen laser module, are an air compressor, power adapter, laser safety goggles, USB cable, tubes, a selection of engraving materials, small tools, smoke exhaust pipe and hose clamp.
You also get a loaded TF card holding sample files and software (LightBurn trial, LaserGRBL, MKSLaserTool), CH340 USB drivers for Mac and Windows, LightBurn device profiles (without camera settings), parameter spreadsheets, the manual and a beginner video.
ACMER’s software page now offers only its own ACMER Studio (V1.5.3, Windows and macOS, plus an Android APK) and no longer lists LightBurn.
While you do get a camera calibration card with the circle/dot pattern, LightBurn has its own calibration method which turned out to be far superior to ACMER’s software and camera accuracy so I moved to LightBurn pretty quickly.
Camera calibration
Camera calibration is two separate jobs. Lens calibration corrects the lens distortion and belongs to the camera, so it can be exported and imported (right-click the camera window, Export or Import). Alignment maps the camera onto this machine, depends on exactly where the camera is mounted, and cannot be borrowed from another owner.
Nobody seems to have shared a P3 LightBurn camera file, though. I checked the LightBurn forum, blogs and Reddit. Even the device profiles on the TF card do not include camera settings!
LightBurn’s lens calibration card can be printed (PDF or LBRN2 from their docs) and stuck to something stiff and flat, engraved onto a flat rigid sheet, or shown full screen on a tablet. Size is not critical as long as the camera can recognise the tags. I used my iPad and prayed that it didn’t shoot the laser at it.
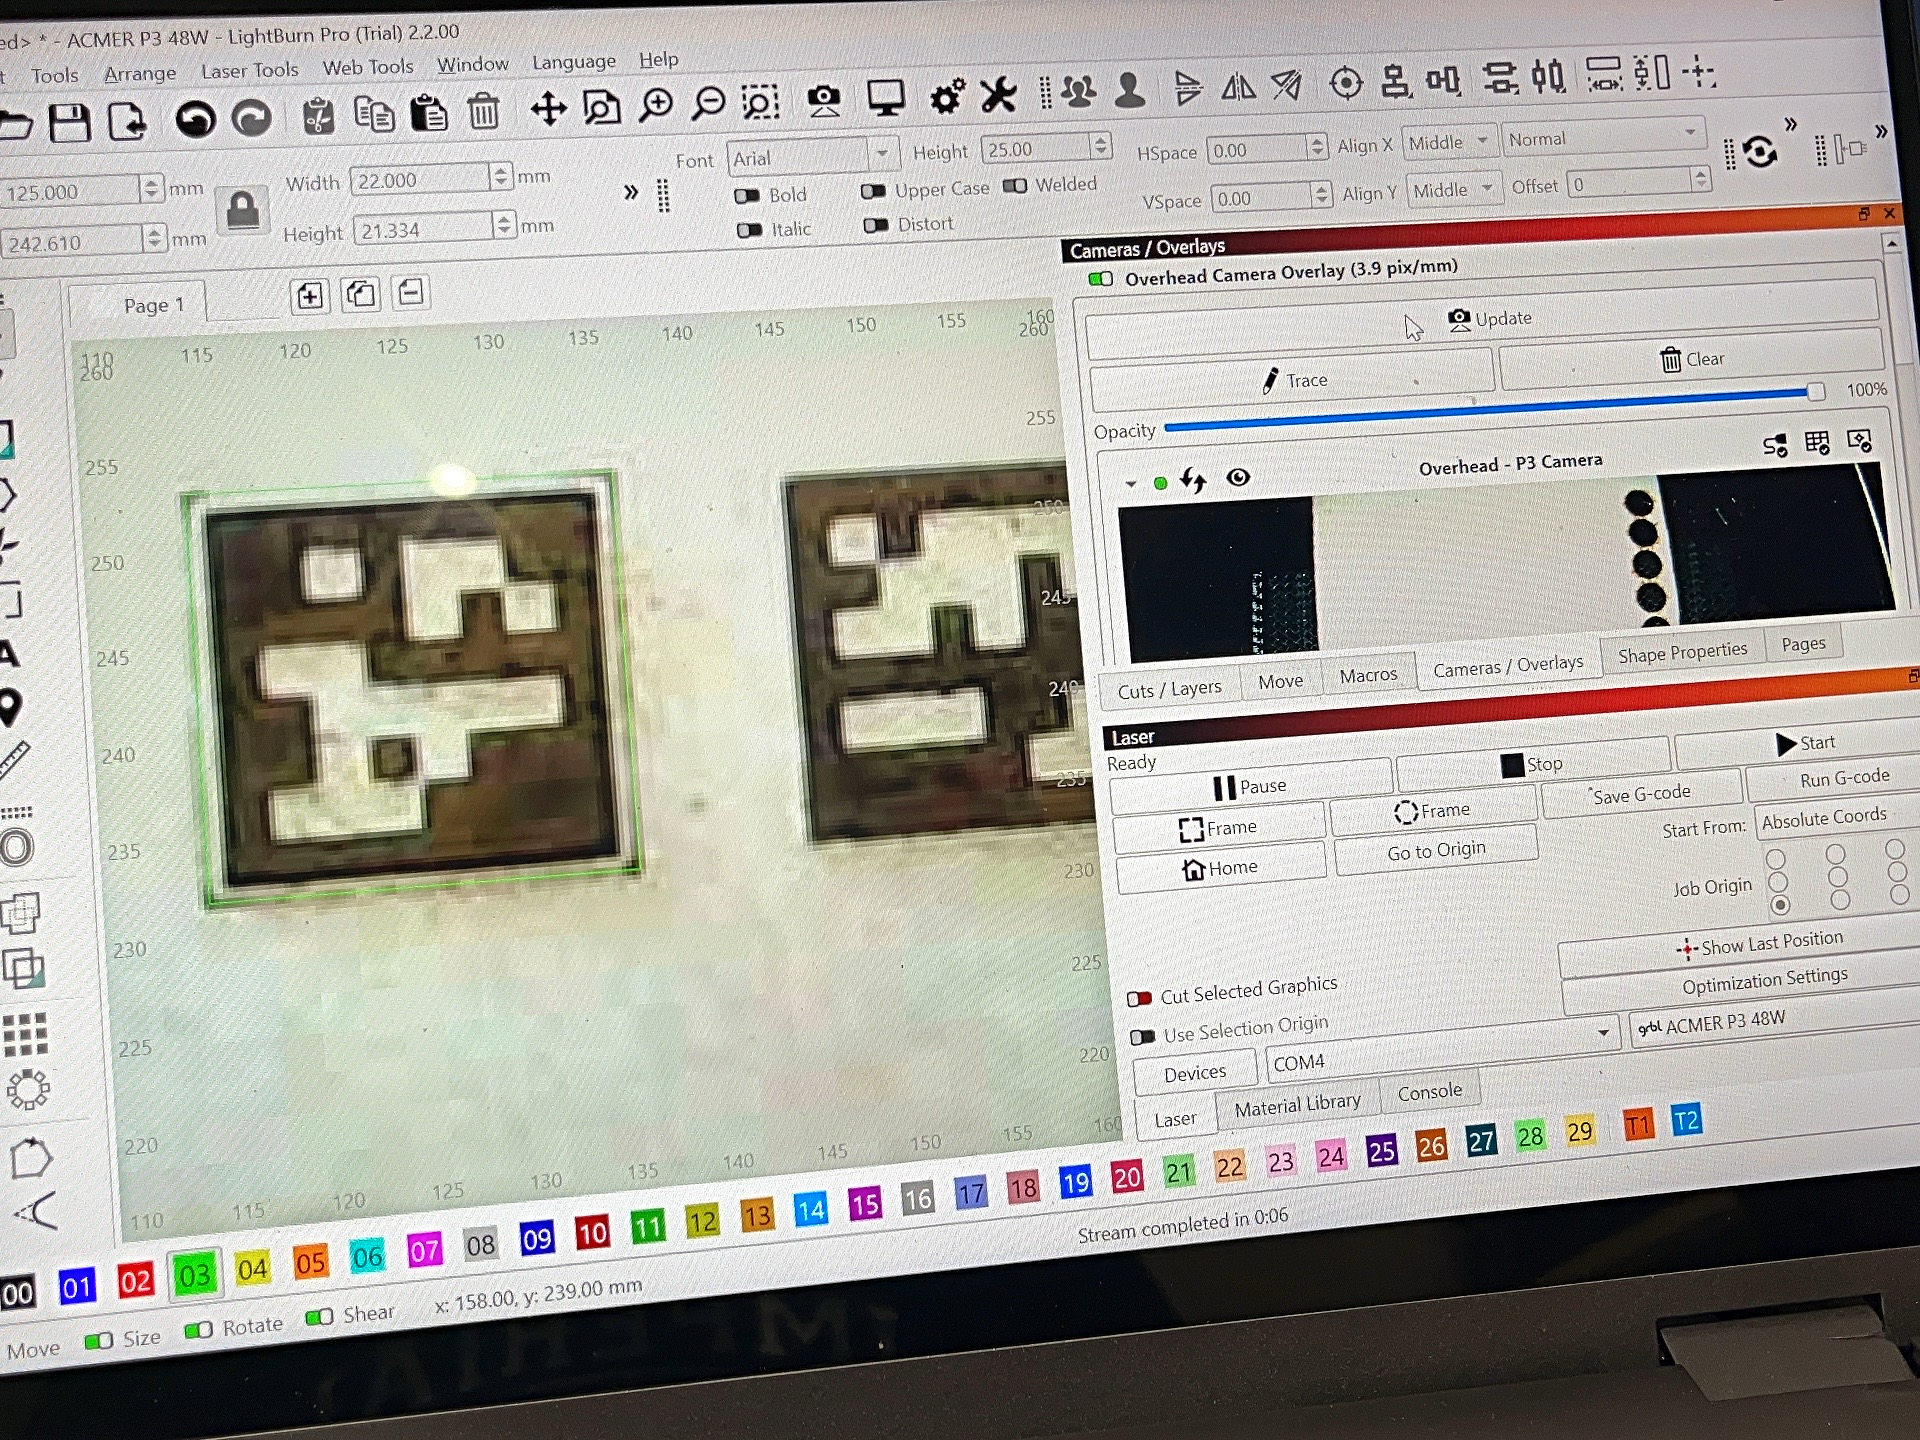
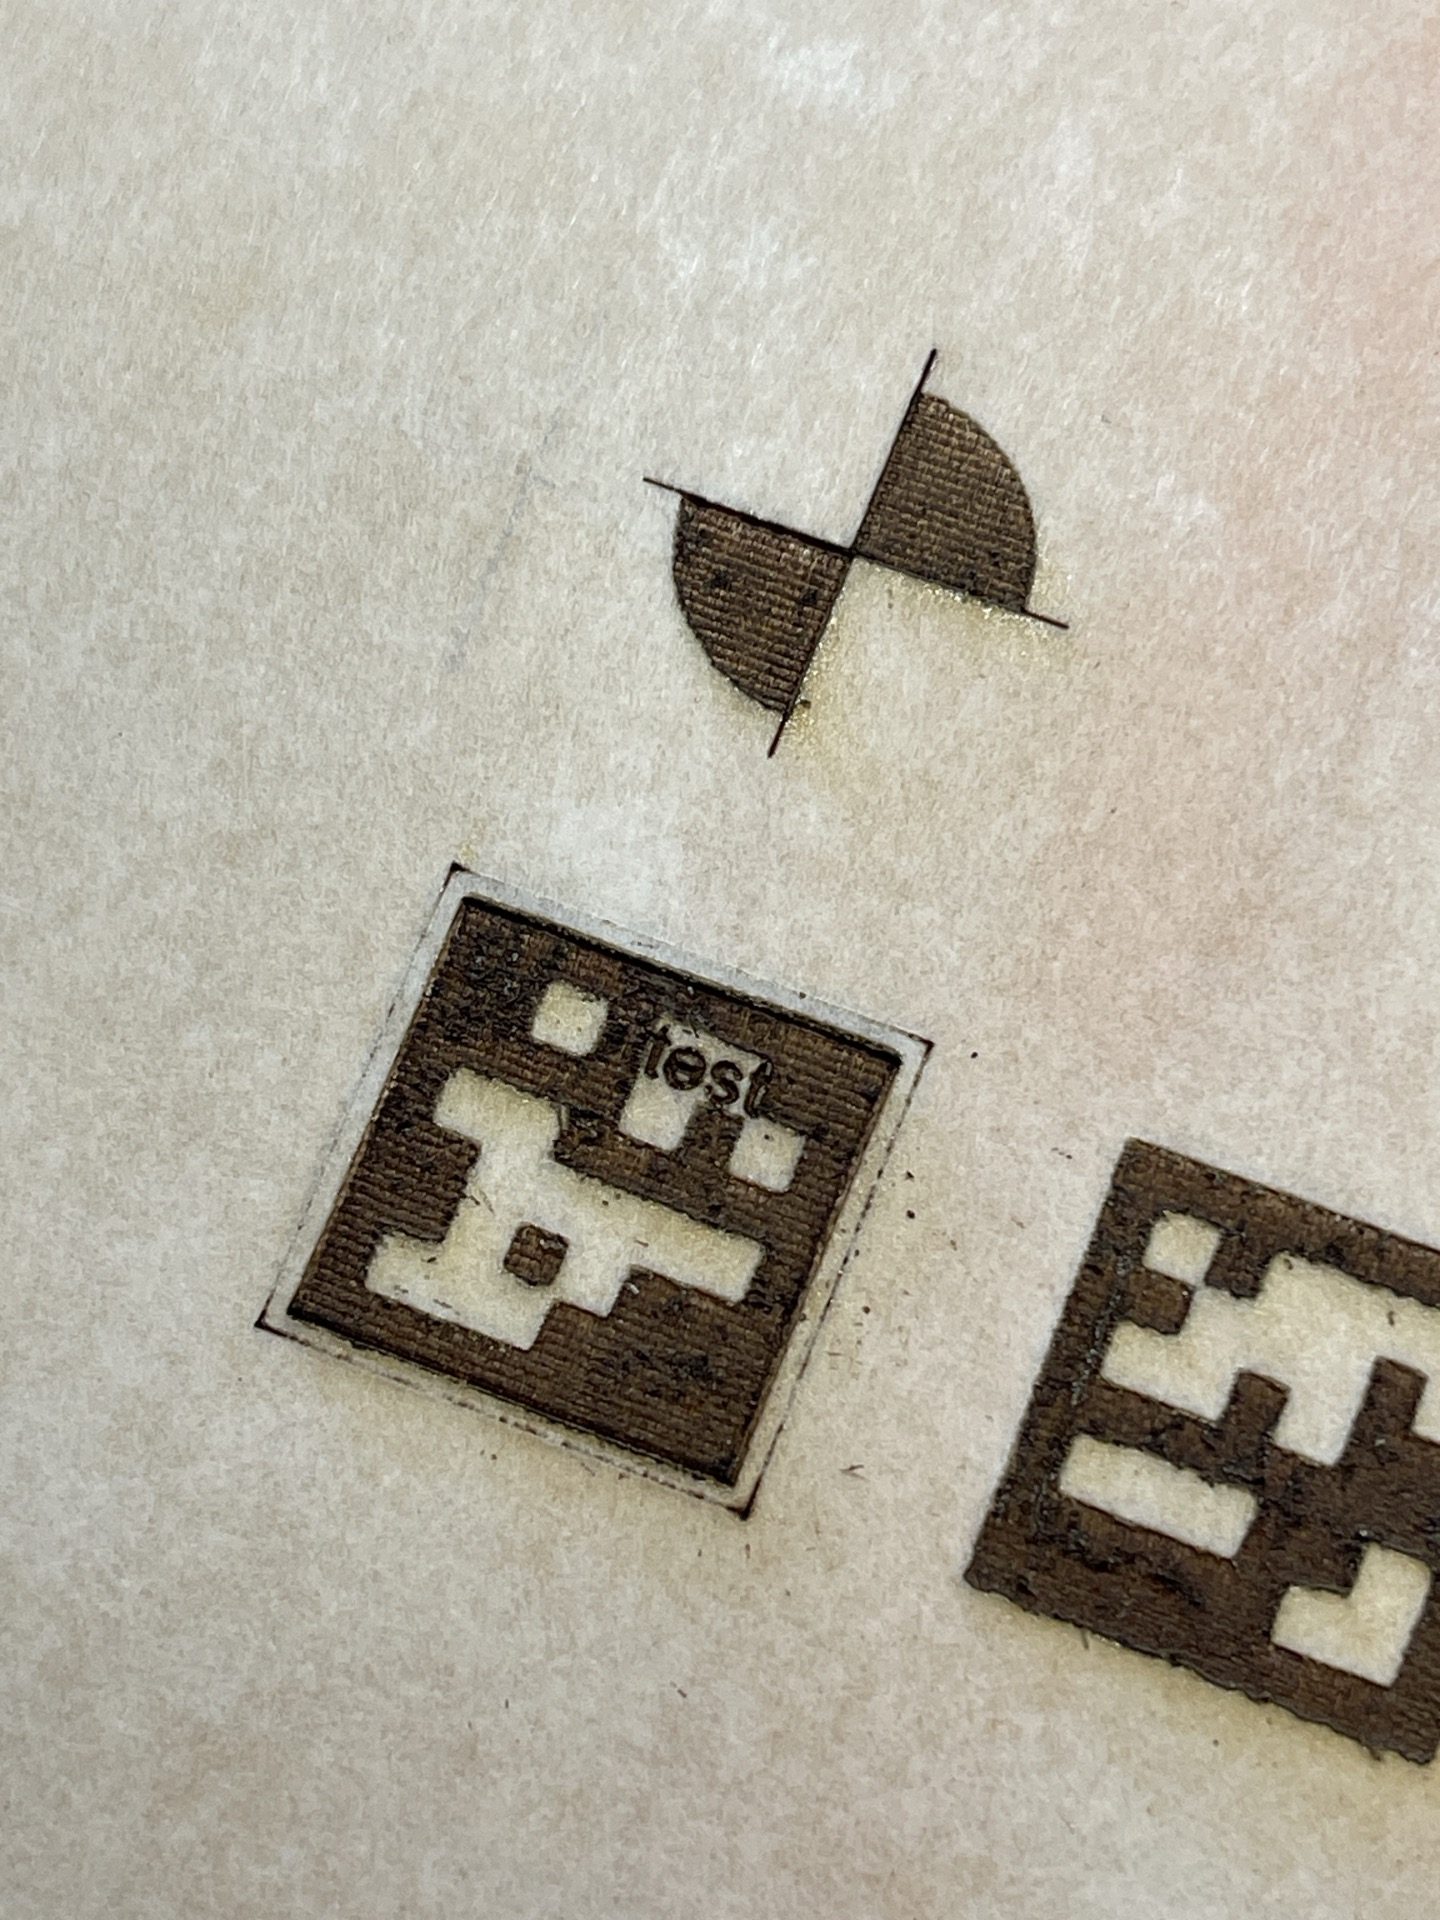
With all that done, my first test was an outline drawn around one of the engraved tags. It worked spot on. Up until that result I was going to report that the camera, even calibrated, was off by a large margin. Just shows that the hardware needs good software.
One thing I did need to correct, though, was that ACMER’s own LightBurn device profile sets the end-of-job return position to top centre, with home on startup switched off. So every job finishes by parking the head on the limit switch, GRBL halts, and its idea of where the head is can no longer be trusted until it is homed again.
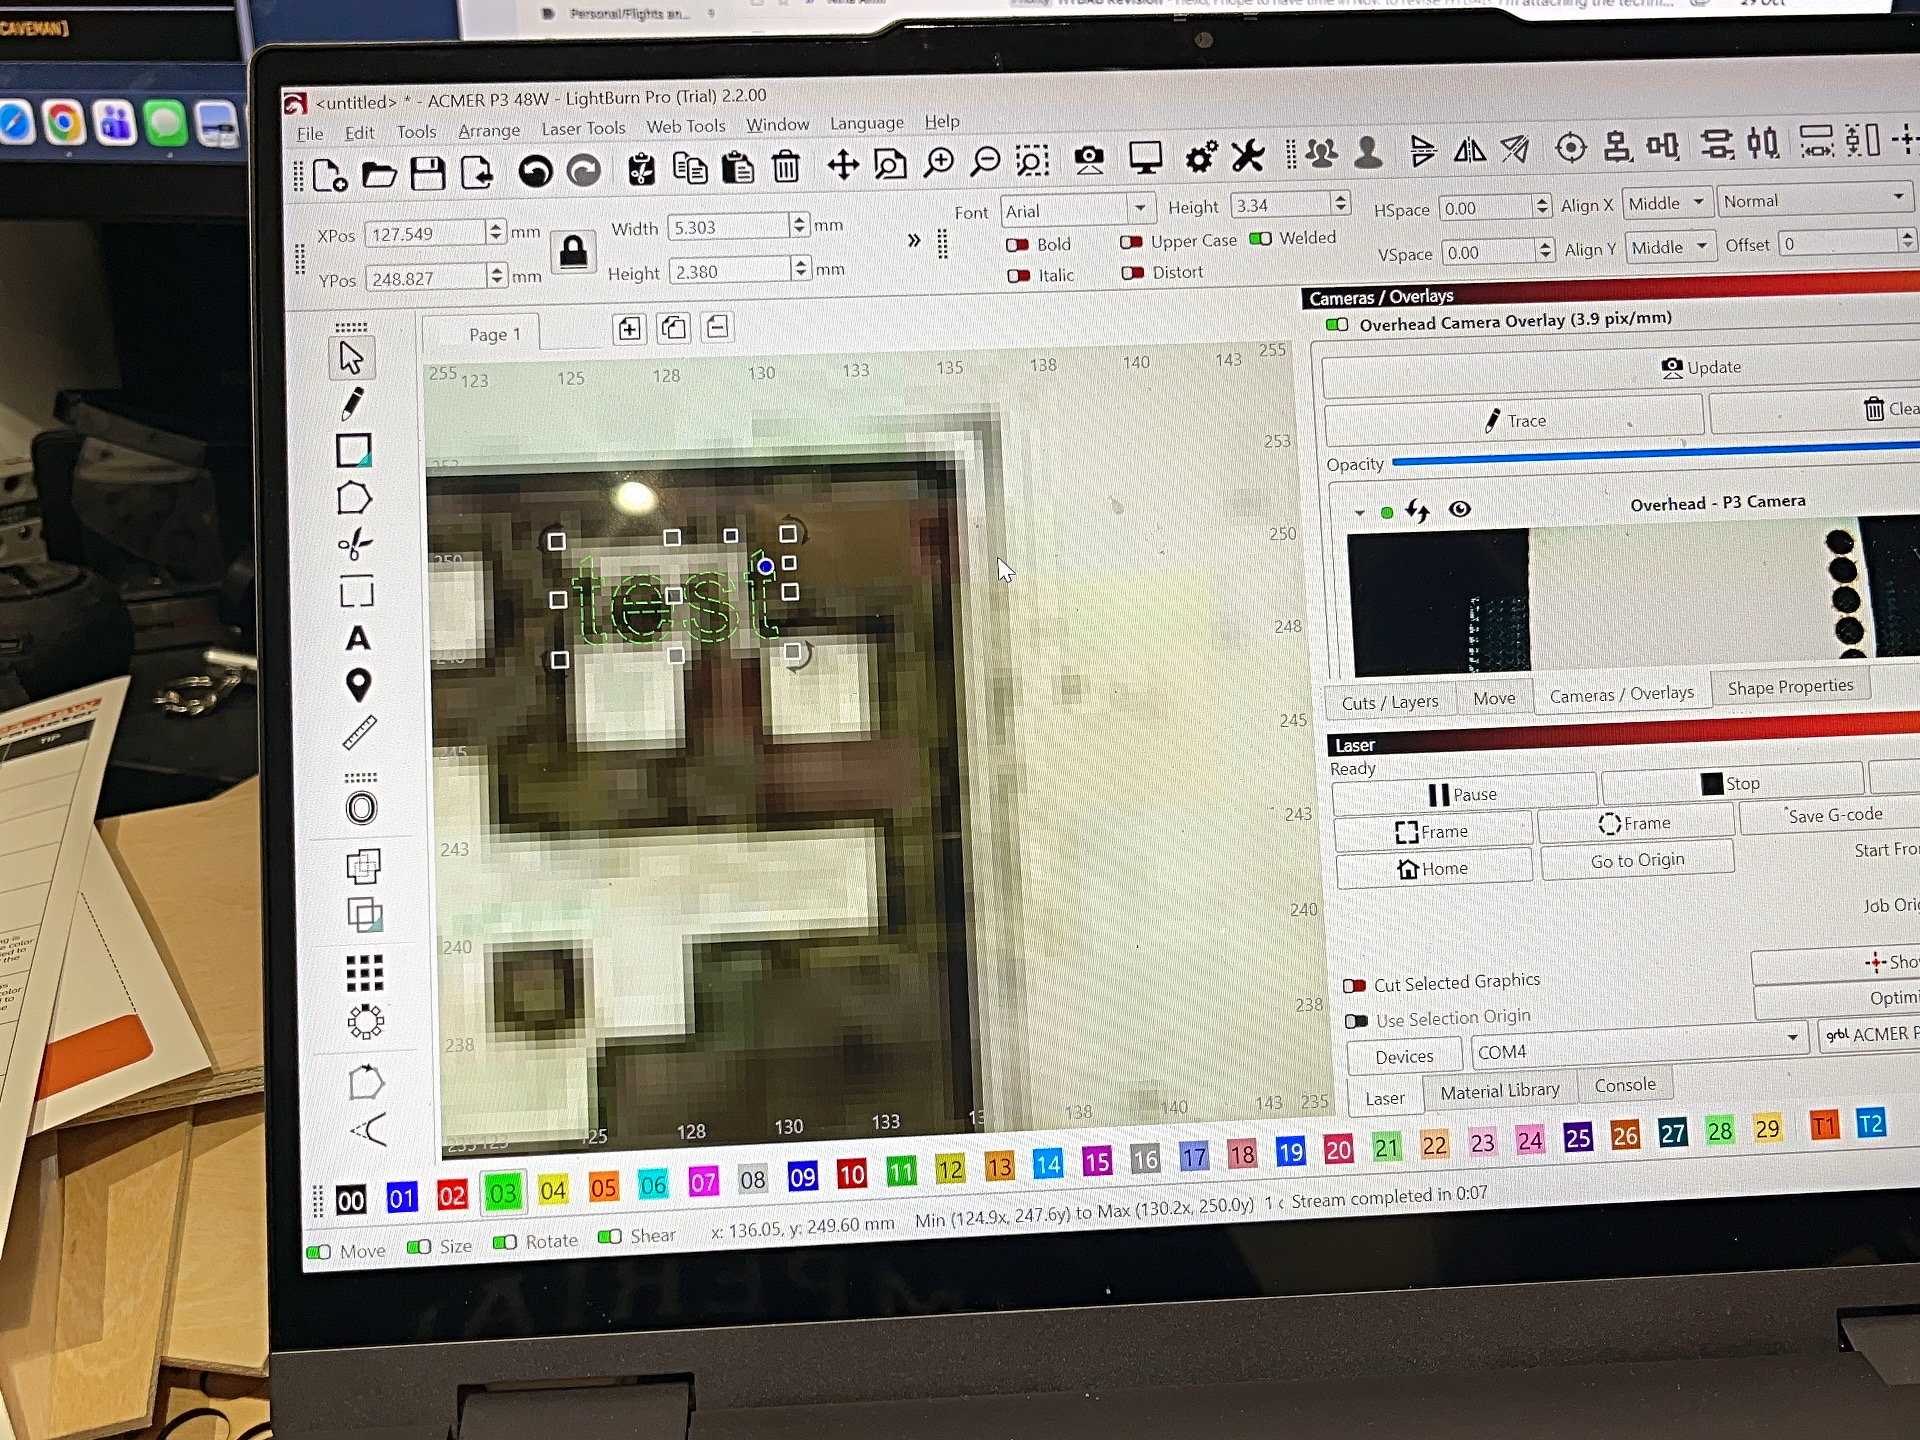
Harder test: the word “test”, just 5.3 mm wide and 2.4 mm tall, placed on the overlay between the squares of one tag. It engraved exactly where I put it.
About those rubber stamps
We have made a lot of rubber stamps over the years. The Glowforge did well with rubber. This ACMER machine has given the best result I have had since. My guess is the air assist on the Glowforge blew down and across the work from a fan rather than straight down, and my tower-style fibre lasers have no air assist at all.
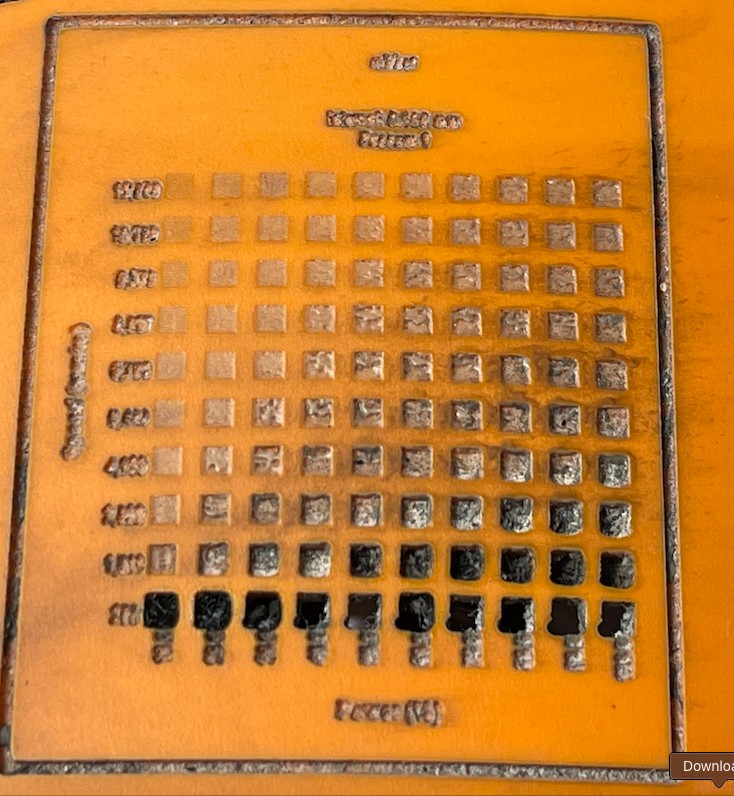
At 200 mm/min it cut straight through at every power, even 10%. Fast and low power gave the cleanest floors. The middle of the grid bubbled and melted.
The grid’s labels were unreadable. I ran them as a line layer at 1,800 mm/min and 30%, which is slow enough to melt small text in rubber.
Second grid: power fixed at 30%, speed 5,000 to 12,000 mm/min against 1 to 5 passes, 0.08 mm interval. Clean floors everywhere, no bubbling. Depth only builds at the slow end with more passes, so depth comes from passes, not power.
Final settings: fill, 5,000 mm/min, 30%, 8 passes, 0.08 mm interval, air assist on. About nine minutes including the cut.
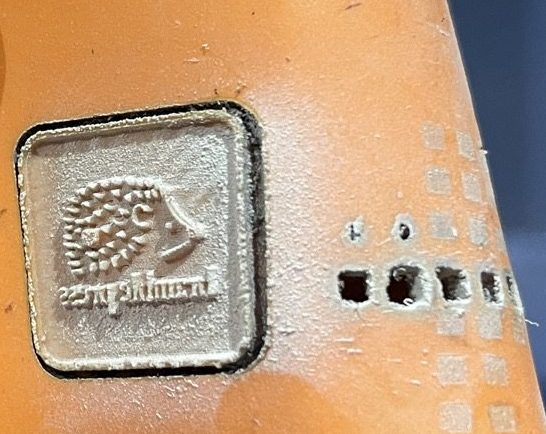
Different rubber, grey PATIKIL rubber stamp sheets from Amazon. Same design, same settings as the orange at 10 passes: it burned straight through.
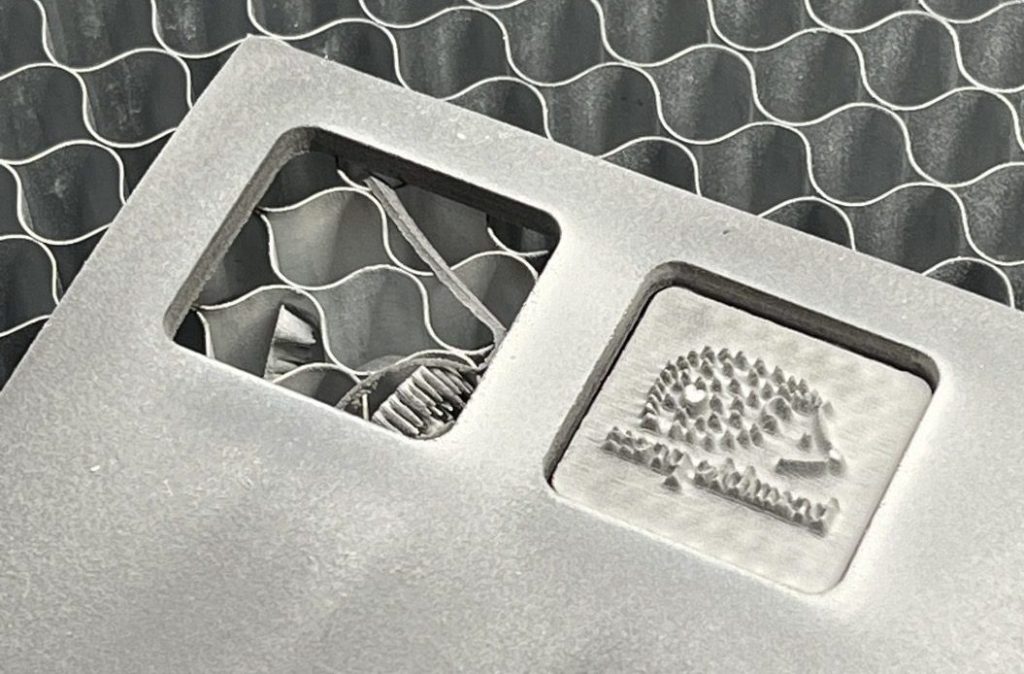
Halving the engrave to 5 passes, otherwise the same, gave the best stamp yet: deep relief, crisp spines and lettering, and a clean cut edge with no charring.
ACMER P3 48W Review Conclusion
All the tests I threw at it cut well, everything from thick plywood to black acrylic. Well, once I switched to LightBurn.
Pros and Cons
For the price, especially when discounted, you get a lot of power and a decent work area. Keep in mind that this is the kind of pricing we used to pay for an open-gantry 10W machine of this size, and we were pretty happy!
Having CoreXY motion makes it quick and reliable. Two stepper motors move both axes, so the gantry carries no motors just the laser module, and it stays light. Circles do come out as circles rather than short jagged line segments that you often see.
Cutting thick plywood and black acrylic both came out well. As mentioned above, we mainly use it for rubber stamps using LightBurn and air assist blowing on the engrave. Once I got the settings dialled in it produced the best rubber results I have seen since we had a Glowforge.
No WiFi is, as mentioned the biggest gripe I have. Another downer is the free ACMER software is fine for beginners and is very welcome, but it is not close to comprehensive, and you need to cost in buying LightBurn, which makes the laser less of a bargain. For example, using the ACMER software it only offers air assist on cuts, you can’t use air assist on engraves, which rubber stamps do need.
Pros
- Easy setup
- Compact for a 400 mm bed, 577 x 655 mm footprint
- 48W is more than most people will need
- Switches down to 24W for finer detail
- The slide-out tray with the honeycomb bolted to it means it goes back in the same place every time, so material positions are repeatable. Unlike a loose honeycomb that slides around under the machine, losing your position.
- Looks pretty cool when it is all lit up
Cons
- After calibration in ACMER Studio the camera was still out by several millimetres
- Frames with the laser at “low power” instead of a red dot, and that low-power pass still burned the sample cork mat!
- The manual says to remove the protective plastic, but some of it is trapped under parts that were screwed down. Getting it all out means unscrewing all the hinges and the camera.
- The ACMER logo on mine is 3D printed. Maybe a test unit thing but printing it face-down on a smooth print surface would have meant I wouldn’t have spotted it. Or, you know, laser cut it.
- The air pump is quiet if you can place it without vibrations, but the exhaust fan is not.
Would I recommend this machine? If you need 48W and the price is right, then yes. I believe the most powerful diode laser xTool sell is 40W on the S1 (which I really like), and that machine doesn’t yet come with a built-in camera, if it is even available now to buy new at all.
With LightBurn, camera aligned and air assist on engraves, the ACMER P3 48W is an amazing rubber stamp cutting machine. That experience turned this into a positive review for me because otherwise the free software made me think the hardware wasn’t up to scratch. A £90/$99 LightBurn purchase makes the machine match its capabilities.
Check out all the details about the ACMER P3 on the ACMER store

 Arzopa Z3FC Review (and why this portable monitor stays home)