
After the Neo6502 wifi tutorial, I was asked if it was possible to do secure web connections (HTTPS / SSL).
I tried and tried but it seems the ESP8266 AT command firmware, which is no longer being updated, has a bug in it.
So instead, here is how to create new ESP8266 Arduino code that allows you to request web pages over either http or https, and also to POST information to web sites and get the response back.
Updating Your ESP8266 WiFi AT Command Firmware
Before anyone asks, yes my firmware is bang up to date (up to the latest, anyway).
To update, enter the following:
View version info
AT+GMR

Perform over the air update
AT+CIUPDATE
Unfortunately, the latest is a few years old and has a bug it seems …

How it is SUPPOSED to Work
The regular firmware, especially after updating to the latest, should allow you to do the following:
Set the SSL Buffer to max
AT+CIPSSLSIZE=4096

Configure SSL certificate
AT+CIPSSLCCONF=0

Connect to server over HTTPS
AT+CIPSTART="SSL","www.google.com",443

Close the connection
AT+CIPCLOSE
That does work on some servers, for example, ahem, example.com.
But no matter what I do, on my own sites, or even Google, it closes the connection before we can request any information. If anyone has a solution, please do let me or the rest of the Neo6502 community know!
Trawling the Espressif forums, it seems a bug or something is missing.
Weird thing is, people reported this working before …
SSL and NTP Time/Date Servers
Could it be the board has the incorrect time and date? Easy fix …
Set time server:
AT+CIPSNTPCFG=1,0,"0.pool.ntp.org","time.google.com"

Get current time:
AT+CIPSNTPTIME?
I even wrote a digital clock example using this :)
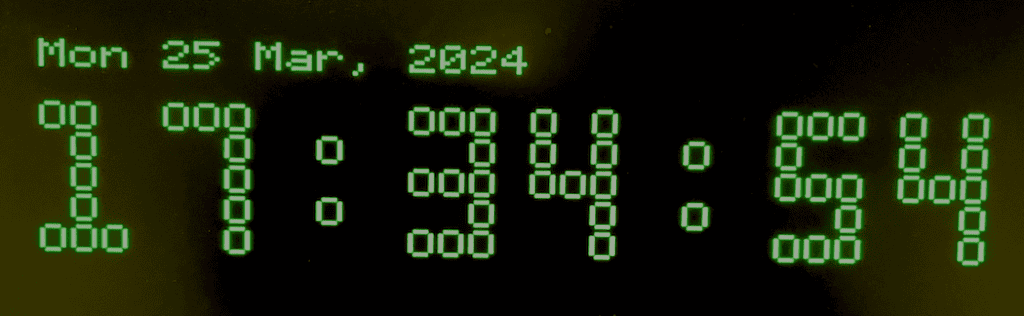
Unfortunately, no joy!
Custom ESP8266 Arduino Code
Rather than modify my almost-stock Olimex board with this, I hooked up a Wemos D1 board and programmed it with the following code.
When you hook up Ground, RX and TX (labelled on the board) instead of having USB plugged in, you can communicate over the pins rather than the usual UART.

Obviously, you will need to replace the placeholders with your actual WIFI name and password!
#include <Arduino.h>
#include <ESP8266WiFi.h>
#include <ESP8266WiFiMulti.h>
#include <ESP8266HTTPClient.h>
#include <WiFiClientSecureBearSSL.h>


String cmd = "";
char *SSID = "YOUR_WIFI_NAME";
char *PASS = "YOUR_WIFI_PASSWORD";

ESP8266WiFiMulti WiFiMulti;


// Plain HTTP
String httpget(String URL) {

  String payload = "";
  WiFiClient client;
  HTTPClient http;
  http.setReuse(true);
  http.setTimeout(6000);
  http.setFollowRedirects(HTTPC_STRICT_FOLLOW_REDIRECTS);
  http.setURL(URL);


  if (http.begin(client, URL)) {

    // start connection and send HTTP header
    int httpCode = http.GET();

    // httpCode will be negative on error
    if (httpCode > 0) {

      // Path was found at server
      if (httpCode == HTTP_CODE_OK) {
        payload = http.getString();
      }


      if (httpCode == HTTP_CODE_MOVED_PERMANENTLY) {
        payload = http.getString() + " " + http.headers();
      }

    } else {

      Serial.printf("Failed with error: %s\n", http.errorToString(httpCode).c_str());

    }


  } else {

    Serial.printf("Unable to connect\n");

  }
    http.end();
    return payload;


}

// Secure HTTPS
String httpsget(String URL) {

  String payload = "";
  std::unique_ptr<BearSSL::WiFiClientSecure>client(new BearSSL::WiFiClientSecure);

  client->setInsecure();

  HTTPClient https;
  https.setReuse(true);
  https.setTimeout(6000);
  https.setFollowRedirects(HTTPC_STRICT_FOLLOW_REDIRECTS);

  // HTTPS connection
  if (https.begin(*client, URL)) {

    // start connection and send HTTP header
    int httpCode = https.GET();

    // httpCode will be negative on error
    if (httpCode > 0) {


      // Path found at server or there was a redirect:
      if (httpCode == HTTP_CODE_OK) {
        payload = https.getString();
      }
      else  {

          Serial.print("HTTP STATUS: ");
          Serial.print(httpCode);
          Serial.println(https.headers());

      }

    } else {
      Serial.printf("Failed with error: %s\n", https.errorToString(httpCode).c_str());
    }

    https.end();


  } else {

    Serial.printf("Unable to connect\n");

  }


  return payload;

}


// Do http/https GET
String wget(String URL) {


  String payload = "";


   // wait for WiFi connection
  if ((WiFiMulti.run() == WL_CONNECTED)) {

    WiFiClient client;
    HTTPClient http;


    Serial.println("Getting " + URL + "...");

    if(URL.indexOf("https://")>=0) {
      payload = httpsget(URL);
    }
    else
    {
      payload = httpget(URL);
    }

  }
  return payload;

}

String httpPOST(String URL, String JSONData) {

  String payload = "";
  WiFiClient client;
  HTTPClient http;
  http.setReuse(true);
  http.setTimeout(6000);
  http.begin(client, URL);
  http.addHeader("Content-Type", "application/json");

  delay(500);
  int httpCode = http.POST(JSONData);

  if (httpCode == HTTP_CODE_OK) {
    payload = http.getString();
  } else {
    payload = http.errorToString(httpCode).c_str();
  }


  http.end();
  return payload;

}

String httpsPOST(String URL, String JSONData) {

  String payload = "";
  std::unique_ptr<BearSSL::WiFiClientSecure>client(new BearSSL::WiFiClientSecure);
  client->setInsecure();
  HTTPClient https;
  https.setReuse(true);
  https.setTimeout(6000);
  https.setFollowRedirects(HTTPC_STRICT_FOLLOW_REDIRECTS);
  https.addHeader("Content-Type", "application/json");


  // HTTPS connection
  if (https.begin(*client, URL)) {

    delay(500);
    int httpCode = https.POST(JSONData);

    if (httpCode == HTTP_CODE_OK) {
      payload = https.getString();
    } else {
      payload = https.errorToString(httpCode).c_str();
    }

  }
  else
  {
    payload = "No HTTPS connection!";
  }

  https.end();
  return payload;

}


String post(String URL, String JSONData){


  String payload = "";

   // wait for WiFi connection
  if ((WiFiMulti.run() == WL_CONNECTED)) {

    WiFiClient client;
    HTTPClient http;

    Serial.println("POSTING to " + URL + "...");

    if(URL.indexOf("https://")>=0) {
      payload = httpsPOST( URL,  JSONData);
    }
    else
    {
      payload = httpPOST( URL,  JSONData) ;
    }

  }
  else
  {
    payload = "NO WIFI";
  }

  return payload;

}


void setup() {

  Serial.begin(115200);
  Serial.println();
  Serial.println();
  Serial.println();

  for (uint8_t t = 5; t > 0; t--) {
    Serial.print(".");
    Serial.flush();
    delay(1000);
  }

  WiFi.mode(WIFI_STA);
  WiFiMulti.addAP(SSID, PASS);

  while (WiFiMulti.run() != WL_CONNECTED) {
    delay(1000);
    Serial.println("Connecting to WiFi..");
    Serial.println(WiFi.status());
  }

/*
Here is how you can set your fixed IP etc
  IPAddress dns0(8, 8, 8, 8);  //Google dns 1
  IPAddress dns1(8, 8, 4, 4);  //Google dns 2

  WiFi.config(WiFi.localIP(), WiFi.gatewayIP(), WiFi.subnetMask(), dns0, dns1);
  Serial.println("TCP/IP configured.");

*/

  Serial.println(WiFi.localIP());
  Serial.println("");

  String timeAPI = "https://timeapi.io/api/Time/current/zone?timeZone=Europe/London";
  Serial.println(httpsget(timeAPI));
  Serial.println("");
}

void loop() {

  String response = "";

  if (Serial.available())
  {
    char chr = Serial.read();

    if ((chr == 8) || (chr == 127) || (chr == 20))
    {
      cmd.remove(cmd.length() - 1);
      Serial.write(chr);
    }
    else if ((chr == '\n') || (chr == '\r'))
    {

      String command = cmd.substring(0, cmd.indexOf(" "));
      String params = cmd.substring(cmd.indexOf(" "), cmd.length());
      cmd = "";

      command.trim();
      command.toLowerCase();
      params.trim();

      if(command == "get") {

        params.trim();
        response = wget(params);
        Serial.println(response);
        Serial.println("");

      }

      if(command == "post")
      {

        String URL = params.substring(0, params.indexOf(" "));
        String JSONData = params.substring(params.indexOf(" "), params.length());

        Serial.println("POST TO " + URL + " with " + JSONData);

        response = post(URL,JSONData);
        Serial.println(response);
        Serial.println("");
      }


    }
    else
    {
      cmd.concat(chr);
    }
  }

}
On the client side, eg. Neo6502 BASIC, you simply send instructions followed by CRLF as before:
get https://www.google.com/

post http://example.com/ {"variable_name":"value"}
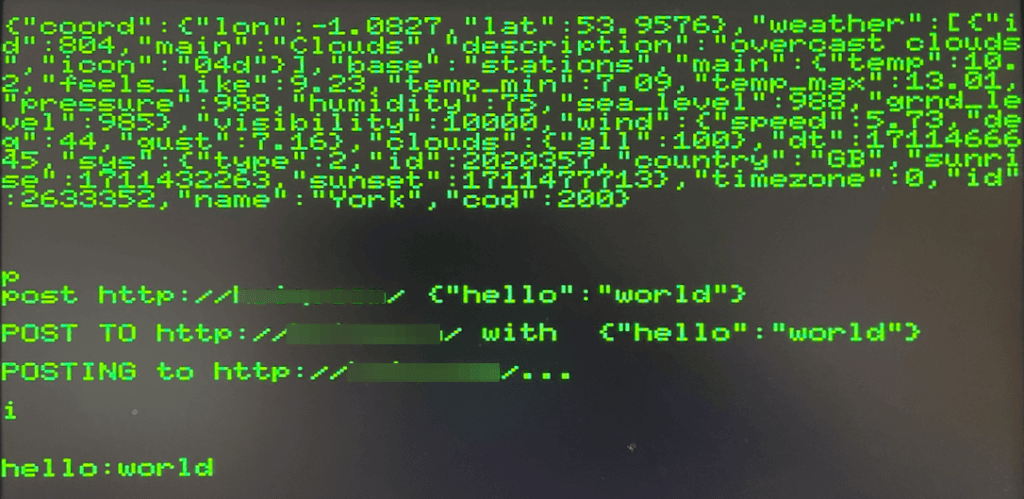
Clearly, it is just an example – far from perfect, but hopefully it illustrates how you can achieve some pretty neat stuff just by connecting devices over plain old serial!

 Neo6502 ESP8266 Serial and WIFI