
Wifi is one of the best ways we can add modern features to retro (or modern retro) computers, and Neo6502 is no exception.
Olimex produce a Wifi Mod based on the ESP8266, and that comes with a simple AT command set that we can communicate with over serial now that Paul has added a bunch of features to the very latest Neo6502 firmware (codenamed “Morpheus“).
So this tutorial will serve to show how we can use serial communication AND get our Neo6502 online!
Hooking Up: UEXT Serial Pins
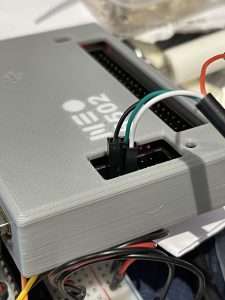
The UEXT port has the serial communication on pins 3 and 4, you might recall the Neo6502 GPIO pins from my earlier tutorial:
1 3.3V
2 GND
3 TXD
4 RXD
This means if you have a USB to UART adapter or, say, an Arduino, you can test out communicating with the board directly.
As well as allowing the Neo6502 to join the matrix, it opens up a whole world of integrations and serial-based computer to computer communication over and above the Neo6502 I2C features we already examined.
Of course, the MOD Wifi module is designed to sit nice and comfy right in the UEXT port, with the notch ensuring proper alignment.

NeoBASIC Serial Features
The main serial commands we need to familiarize ourselves with are:
uconfig
usend
ureceive
uhasdata
First, we tell the Neo6502 to set our baud rate. This is the communication speed so we can synchronize our sending and receiving of data with the module.
Next, we can send messages to the board using usend and receive via ureceive. We can ask if there is any data waiting for us using uhasdata.
Interactive Serial Session using BASIC
This little BASIC program will allow you to communicate with another machine interactively, allowing you to alternate between sending and receiving messages. End the program using QUIT all in uppercase followed by return/enter.
uconfig 115200
buffer=alloc(500) :buflen=0
i$=""
while i$ <> "QUIT"
    input i$
    call serialsend(i$)
    call serialread()
wend

end

proc serialread( )
    while uhasdata( ) =0
        wait 1
    wend
    while uhasdata( ) = -1
        ureceive buffer+buflen,1
        buflen=buflen+1
    wend
    for c=0 to buflen
        print chr$(peek(buffer+c) ) ;
    next
    buflen=0
    print""
endproc

proc serialsend(st$ )
    usend st$ +chr$(13) +chr$(10)
    wait 50
endproc
First, we set our baud rate to 115,200, which the module comes set as default but check if communicating with something else – 9600 is quite common.
You might notice that you seem to get a repeat of what you send, that is because by default “echo” is switched on, and we can switch that off using what are called “AT commands”.
Using the AT Commands
AT commands, aka the “Hayes Command Set“, goes all the way back to 1981 and the Hayes 300 baud modem. This was the way that Smartmodem users could control their modem and configure essential settings.
It was so popular that pretty much everyone else copied it, making it a standard that grew and was expanded over time.
For our purposes, we simply need to know that these commands are strings that need to be followed by a carriage return and linefeed.
As mentioned, if we wanted to turn echo off, we can enter ATE0.
The module will respond in the affirmative and from then on we will only see actual responses rather than our commands echoed back to us.
Here are some more useful commands that we will need:
Essential Wifi Module/ESP8266 AT Commands
Get the current wifi mode AT+CWMODE?
Set wifi to “station” mode AT+CWMODE=1
Reset/reboot the board with AT+RST
List accessible wifi hotspots AT+CWLAP
Login to your hotspot with AT+CWJAP_DEF="ssid","password"
Get current IP address AT+CIFSR
The stock firmware is likely to be quite old, but once you are connected via wifi you can do an “over the air update”!
View your current firmware version info with AT+GMR
Get over the air firmware update with AT+CIUPDATE
Factory reset your module with AT+RESTORE
More Useful ESP8266 AT Commands
Those were the essentials, but to actually communicate via the ESP8266, and not just with the wifi module, we need some more useful AT commands:
AT+CIPSTATUS Get connection status
AT+CIPSTART Establish TCP connection or register UDP port
AT+CIPSEND Send data
AT+CIPSENDEX Send data, if or “\0” is met, data will be sent
AT+CIPSENDBUF Write data into TCP-send-buffer
AT+CIPBUFRESET Reset segment ID count
AT+CIPBUFSTATUS Check status of TCP-send-buffer
AT+CIPCHECKSEQ Check if a specific segment is sent or not
AT+CIPCLOSE Close TCP/UDP connection
AT+CIFSR Get local IP address
AT+CIPMUX Set multiple connections mode
AT+CIPSERVER Configure as server
AT+CIPMODE Set transmission mode
AT+SAVETRANSLINK Save transparent transmission link to Flash
AT+CIPSTO Set timeout when ESP8266 runs as TCP server
AT+CIUPDATE Upgrade firmware through network
AT+PING Function PING
AT+CIPDINFO Show remote IP and remote port with “+IPD”
Wifi Test Basic Program
Connect to your wifi router then run this program to test that you are communicating with the module properly and your wifi connection is working:
uconfig 115200
buffer=alloc(500) :buflen=0

print "Checking Wifi Module"
call serialsend( "AT" )
call serialread( )

print "Set no echo"
call serialsend( "ATE0" )
call serialread( )

print "Set DNS server to Google"
call serialsend( "AT+CIPDNS_CUR=1,"+chr$(34)+"8.8.8.8"+chr$(34) )
call serialread( )

print "Ping Google"
call serialsend( "AT+PING="+chr$(34)+"www.google.com"+chr$(34) )
call serialread( )

print "Check for Wifi hotspots"
call serialsend( "AT+CWLAP" )
call serialread( )

print "Requesting IP Address"
call serialsend( "AT+CIFSR" )
call serialread( )

print ""
print "Done"
print ""
end

proc serialread( )
    while uhasdata( ) =0
        wait 1
    wend
    while uhasdata( ) = -1
        ureceive buffer+buflen,1
        buflen=buflen+1
    wend
    for c=0 to buflen
        print chr$(peek(buffer+c) ) ;
    next
    buflen=0
    print""
endproc

proc serialsend(st$ )
    usend st$ +chr$(13) +chr$(10)
    wait 50
endproc
There are more in the official document from Espressif.
Communicating Over HTTP and Getting a Web Page
Keeping in mind we are operating a microprocessor from the 1970s and 1980s, there are still a lot of fun things we can do via the web using our newly acquired wifi features.
I put together a little example here of both the client and server side of a web service. First, the basic code for our web client:
Get.bas
uconfig 115200
buffer=alloc(500) :buflen=0
protocol$=""
host$=""
path$=""

call wget( "http://YOUR_SERVER/" )
print ""
print "DONE"
print ""
end


proc serialread( )
    while uhasdata( ) = 0
        wait 1
    wend
    while uhasdata( ) = -1
        ureceive buffer+buflen,1
        buflen=buflen+1
    wend
    for c = 0 to buflen
        ch = peek(buffer+c)
        print chr$(ch);
    next
    buflen = 0
endproc

proc serialsend(st$ )
    usend st$ +chr$(13) +chr$(10)
    wait 50
endproc


proc spliturl(url$)

    protocol$=""
    host$=""
    path$=""

    protocolend = instr(url$,"/")+1
    protocol$=mid$(url$,1,protocolend)
    url$=mid$(url$,protocolend+1)
    pathstart=instr(url$,"/")
    host$=mid$(url$,1,pathstart-1)
    path$=mid$(url$,pathstart)

endproc

proc wget(url$)

    call spliturl(url$)
    print "protocol: " + protocol$
    print "host: " + host$
    print "path: " + path$


    call serialsend( "AT+CIPSTART="+chr$(34)+"TCP"+chr$(34)+","+chr$(34)+host$+chr$(34)+",80" )
    call serialread( )
    s$="GET " + path$ + " HTTP/1.1" + chr$(13) + chr$(10) + "Host: " + host$
    call serialsend( "AT+CIPSEND=" + str$(len(s$)+4))
    call serialread( )
    call serialsend( s$ +chr$(13) +chr$(10)+chr$(13) +chr$(10))
    call serialread( )

endproc
Most Simple Python Web Server
If you don’t have a web server already, no problem, Python has one built in!
Create a directory and create an index.html just containing any plain text, then enter the following command:
python3 -m http.server 80
(You might need to pip3 install httpserver )
Now run the get.bas you created earlier and you should see a bunch of stuff that includes the message you put in your index.html …

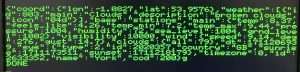
On a spare domain, I put up a PHP script that utilizes a weather service API to get our local weather and return the result:
`
Weather.PHP

You will need an API key from openweathermap.org
<?php

$key="YOUR OPEN WEATHER MAP API KEY";
$url="http://api.openweathermap.org/data/2.5/weather?q=York,UK&APPID=".$key."&units=metric";
$result=file_get_contents($url);
print($result);

?>

 Use the MCP23017 GPIO Port Expander to Add 16 IO Pins