• Skip to main content
  • Skip to header right navigation
  • Skip to site footer
makerhacks-logo

Maker Hacks

Ideas, news & tutorials for makers and hackers – Arduino/Raspberry Pi, 3D printing, robotics, laser cutting, and more

  • Home
  • About
  • 3D Printing
  • Laser Cutting
  • YouTube
  • Free Arduino Course
  • Recommendations
  • Contact

2010 MacBook Pro SSD and Battery Upgrade

You are here: Home / Electronics and Hardware / 2010 MacBook Pro SSD and Battery Upgrade
FacebookTweetPin
Author: Chris Garrett

Remarkably easy upgrade to a tired old 2010 Apple MacBook Pro

One of the things Makers are known for is not just building new stuff, but for getting a lot of use out of old stuff. Repairing, reuse, repurpose is as much part of maker culture as the creativity and engineering aspects. With that in mind, when my old MacBook Pro started showing signs of age, I knew what I had to do!

I have to say, I did follow the fantastic IFixit guides, and I bought their kit, so I knew I would have no trouble. In all it took me under an hour to get the machine back to the point of installing MacOs, and it now runs like a new machine. Next step will be to upgrade the RAM to the machine’s maximum :)

  • Replacing the MacBook Battery
  • Upgrading the hard drive to 1TB SSD
Ifixit package
Remove screws
Keep screws safe
Three longer screws
Slide carefully
Battery connection
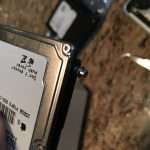
Remove old drive
Keep this safe
Insert new drive
Insert screws from old drive
Replace battery
Reinsert screws
Add old drive to USB enclosure
Close up the case
Reboot
Read old drive via USB
Use CMD-R
Reinstall OS
Prepare drive
Category: Electronics and HardwareTag: Makes
FacebookTweetPin

About Chris Garrett

Marketing nerd by day, maker, retro gaming, tabletop war/roleplaying nerd by night. Co-author of the Problogger Book with Darren Rowse. Husband, Dad, ?? Canadian.

Check out Retro Game Coders for retro gaming/computing.

☕️ Support Maker Hacks on Ko-Fi and get exclusive content and rewards!

Previous Post:ESP8266 Thermometer How to Make a DIY “Internet of Things” Thermometer with ESP8266/Arduino
Next Post:Pocket CHIP Review

Sidebar

  • Facebook
  • Twitter
  • Instagram
  • YouTube

Join the Newsletter

Sign up and get a free Arduino course + more!

Subscription Form

Recently Popular

  • xTool S1 Review
  • xTool P2 Review (first look)
  • IKIER K1 Pro Max Review
  • Gweike Cloud Review
  • How to choose the right 3D printer for you
  • Glowforge Review – Glowforge Laser Engraver Impressions, Plus Glowforge Versus Leading Laser Cutters
  • Flux Ador
  • Prusa i3 Mk3S Review
  • Best 3D Printing Facebook Groups
  • xTool D1 Pro Laser Cutter Review
  • Elegoo Mars Review – Review of the Elegoo Mars MSLA Resin 3D Printer
  • Glowforge ‘Pass-Through’ Hack: Tricking the Front Flap of the Glowforge with Magnets to Increase Capacity
  • How to Make a DIY “Internet of Things” Thermometer with ESP8266/Arduino
  • Wanhao Duplicator i3 Review
  • IKEA 3D Printer Enclosure Hack for Wanhao Di3
  • Creality CR-10 3d printer review – Large format, quality output, at a low price!
  • 3D Printed Tardis with Arduino Lights and Sounds
  • Anet A8 Review – Budget ($200 or less!) 3D Printer Kit Review
  • Make your own PEI 3D printer bed and get every print to stick!
  • Upgrading the Wanhao Di3 from Good to Amazing
  • How to Install and Set Up Octopi / Octoprint
  • Creality CR-10 S5 Review
  • Glowforge Air Filter Review
  • Thunder Laser Review

30 Days to Arduino

Arduino Tutorials
  • 3D Printing
  • CNC
  • Electronics and Hardware
  • Laser Cutting
  • News and Reviews
  • Software and Programming

arduino budget cad cnc diode laser glowforge Hacks Ideas laser cutter linux Makes making python raspberry pi resin Reviews technology tips xTool Lasers

.

Maker Hacks Blog Copyright © 2026 · All Rights Reserved · Privacy Policy