
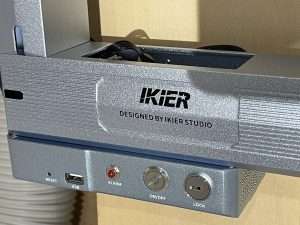
Update, 2026. This machine has been discontinued and the shop link below now 404s. I have left the review up because the build notes and the general lessons still apply, but do not go hunting for one of these.
What I recommend now for lasers: xTool. My tools page has the rest of what I actually use.
Diode lasers are a great entry into the world of engraving and cutting, and some people get so comfortable and productive that they never leave. There are a lot of conveniences with diodes but the power output has always let them down from really competing with the CO2 guys … until now.
TL;DR
IKIER K1 Pro Max, is it worth it? The short answer is yes! While you must purchase the laser bed separately, and the lack of WIFI, otherwise the machine is fantastic. The build quality is top-notch, and at 48W I don’t know of any other diode laser that can cut the way that this one can.
What is it?
IKIER, based in Shenzhen, China, has introduced “the world’s first power switching laser cutter and engraver“, the 48W/24W iKier K1 Pro Max.
This machine claims high speeds up to 900mm/s, which is up to four times faster than competitors.
At 48W it can handle many materials ordinarily out of reach of a regular laser cutter, but being a diode it can still not cut certain materials due to wavelength, such as clear acrylic.
Standout features include the autofocusing motorized z-axis, “Auto Sinking Cutting”, and safety features such as a flame detection system.
I was sent this unit because they spotted my review of the xTool D1 Pro, which I thought was brilliant. They are not paying me, but I did get the machine for free in return for my unbiased review, and of course, my Amazon links might give me a small commission if you end up buying something.
Let’s see how this machine stands up against it …
Unboxing the IKIER K1
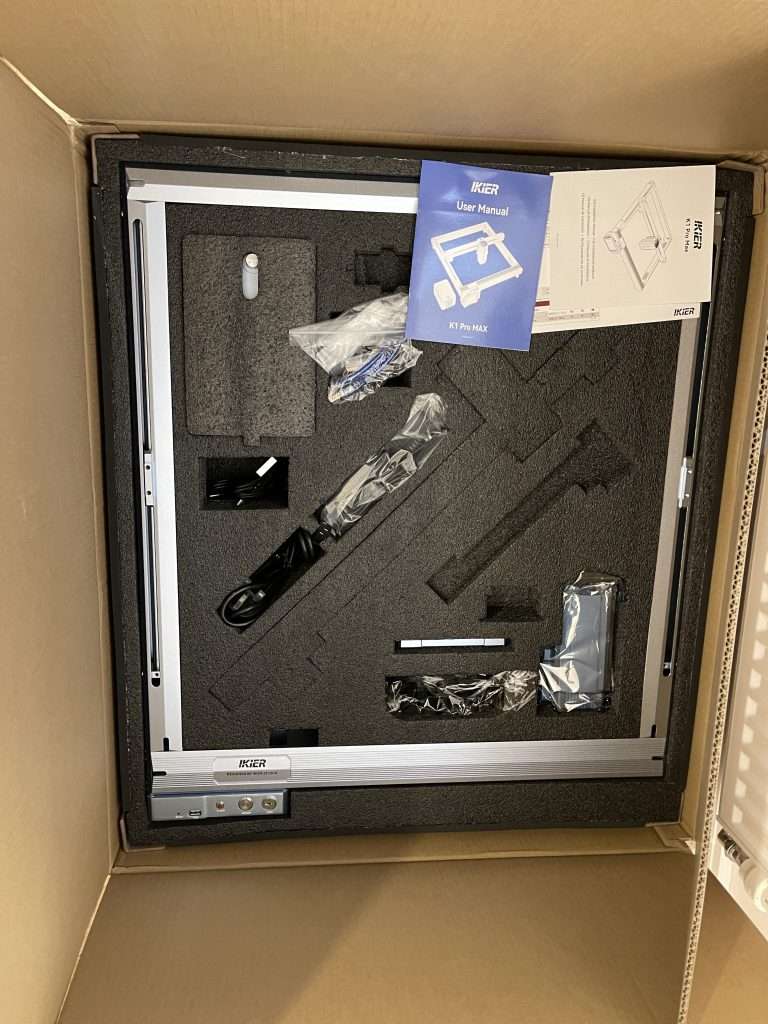
Everything was packed very well, in sturdy foam and cardboard boxes. It’s not super heavy, due to the fact there is no enclosure and disappointingly no bed surface, which we will bring up later.
As well as the machine, you get the tools required to put everything together and a couple of thin getting-started guides.
You also get a pair of cheap feeling safety glasses, which is important because, as mentioned, it is not enclosed. Take adequate precautions for your eyes and lungs, I wouldn’t trust these Aliexpress quality plastic guys to protect me.
In addition to all the expected stuff, there is also a manual focus block, which is nice, and a USB stick for things like manual running of laser files, firmware updates, and some docs.
Right away you spot a cool feature, however, and that is the magnetic color touch screen. It allows you to control the unit from the machine itself and is powered and attached using a coiled HDMI cable.
Specifications
| Item | Details |
|---|---|
| Model | K1 Pro Max 48W / 24W |
| Engravable Work Area | 410mm*410mm |
| Electric Power | 100-240v AC to 24v DC |
| Laser Power | 48W, 24W switchable |
| Spot Size | 0.08mm*0.1mm (24W), 0.1mm*0.15mm (48W) |
| Engraving Precision | 0.01mm Engraving Accuracy |
| Laser Focal Length | 40mm |
| Laser Wavelength | 455±5nm |
| Focusing | Autofocus or Manual |
| Z-Axis | Powered with Automatic Sinking |
| OS Compatibility | Windows, macOS, Android, iOS |
| Software | LightBurn, LaserGRBL |
| Connectivity | USB, WiFi * |
| Package Weight | 13kg |
| Dimensions | 650mm*750mm*222mm |
| Package Dimensions | 780mm*500mm*153mm |
Setting Up the IKIER K1

After building dozens of 3D printers, lasers, and CNC machines over the years, I am kind of past the “fun” of building these things so I was not looking forward to seeing how many steps there were in the process.
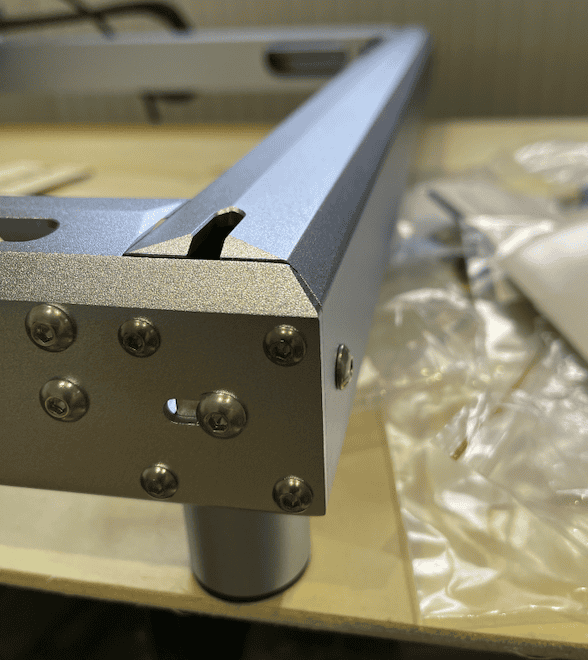
I was delighted to discover that there are just 8 screws to insert and some snap-together cables and I managed it in a few minutes, despite trying to insert a screw into where there were already grub screws at one point!
It all feels high quality and well thought-out. Cable management is decent, and there are no times when you feel they skimped on anything.
The automatic air assist is connected with a DC power lead and rubber tubing, with a manual dial on top for air pressure.
When it came to setting up for the first cut was where I had my first delay. It doesn’t come with any laser bed surface, nothing! Ordinarily, there would be at least a sheet of metal, which I would complain about because I prefer slats or better, honeycomb. This guy doesn’t come with anything.
Considering the potential laser power we are talking about, 48W, you need to protect whatever is under the laser. Keep this in mind when considering comparing prices.
I went out and got myself the largest sheet of 3mm plywood I had in storage that was just large enough for the feet to not fall off the edges. Ideally, you would want something not just larger (the machine is 25.6 x 29.5″) but a lot thicker as you will see later.
The next delay was I had to get a very large USB extension cable if I wanted to control the machine from my computer, or if you have a laptop take the computer to the laser I guess. There is a pretty pointless Android and iOS smartphone app, but I only really put up with that when trying to get WIFI working, see below.
IKIER K1 and LightBurn Software
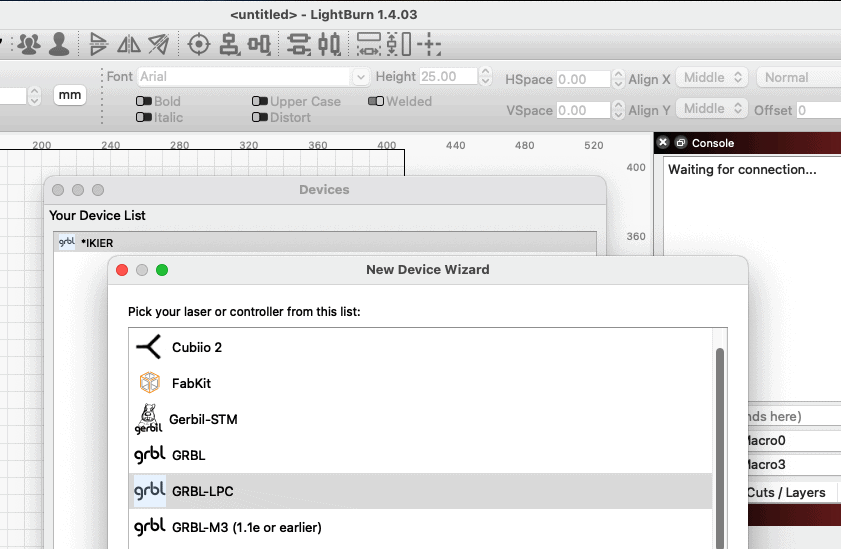
The saving grace software-wise for the IKIER is LightBurn compatibility, which is a bare minimum in 2023 I would say. On Mac that is our only option and it is a commercial tool, so again add that into your pricing comparisons.
Thankfully it seems truly compatible, unlike some other lasers that are playing catch up on that front.
Once you have a long enough USB cable, LightBurn detects the laser fine.
Here is how I set up the device definition for the IKIER K1:
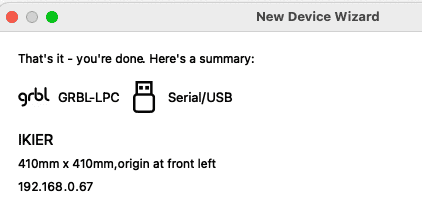
It detected GRBL-LPC but others on the internet say to use GRBL. Who knows.
To allow “sink” cuts (AKA Z step per pass) you need to set up your device to enable Z axis under the Device Settings menu item:
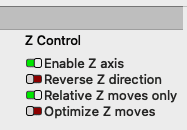
Thanks to the internet I found the correct way to add a focus button, you need to configure one of the LightBurn macro buttons thusly:
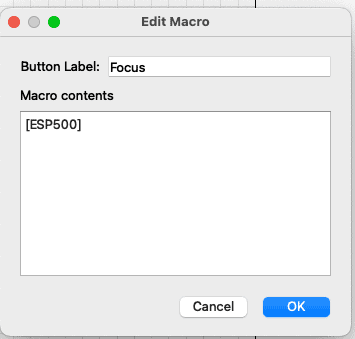
That seemed to work fine, and it communicates well. I do have to turn on the laser after launching LightBurn, but that could be my Mac and not the setup.
Now we come to another delay …
IKIER K1 WIFI Problems
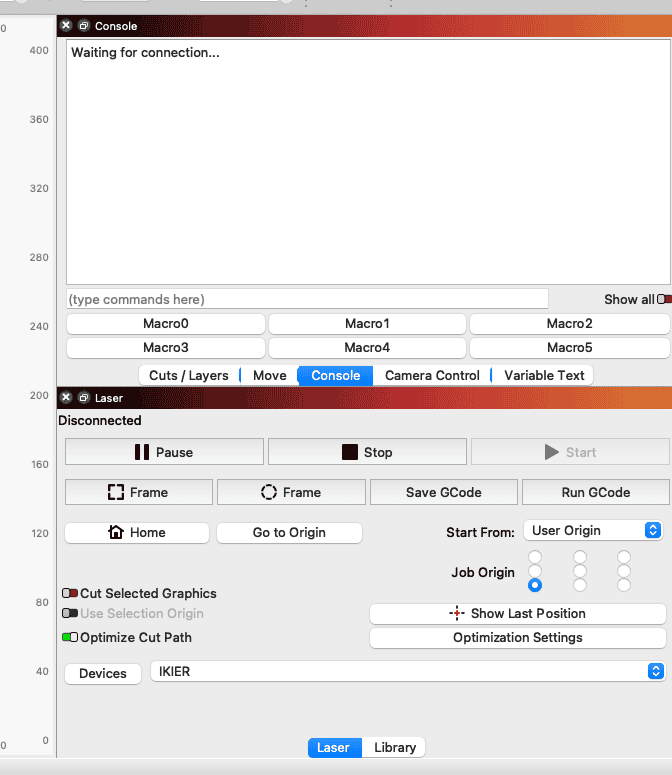
Even though the IKIER has WIFI capability you can not use it with your computer, only your phone. How crazy is that?
I lost hours and hours to this because I felt it must be possible. How could they not provide that last piece when the foundations are right there?
You can ping it from your computer, once you figure out the IP address. The phone app works over WIFI so it does communicate. Is it refusing to connect or is it configured on a weird IP port?
My hope is a firmware or LightBurn configuration solves this. It is a major minus against an otherwise excellent machine.
IKIER K1 Pro Max Pros and Cons
| Pros | Cons |
|---|---|
| 48W or 24W – Cutting power or finer engraves | WIFI capable but non-functioning |
| Autofocus or manual focus ability | No laser bed |
| Automatic air assist | Not enclosed |
| Fast movement and engraves | No fume extraction |
| LightBurn compatible | Instructions are slim and do not always explain important details (eg. LightBurn config) |
| Good sized work area | No LightBurn profile provided |
What Can the IKIER K1 Cut?
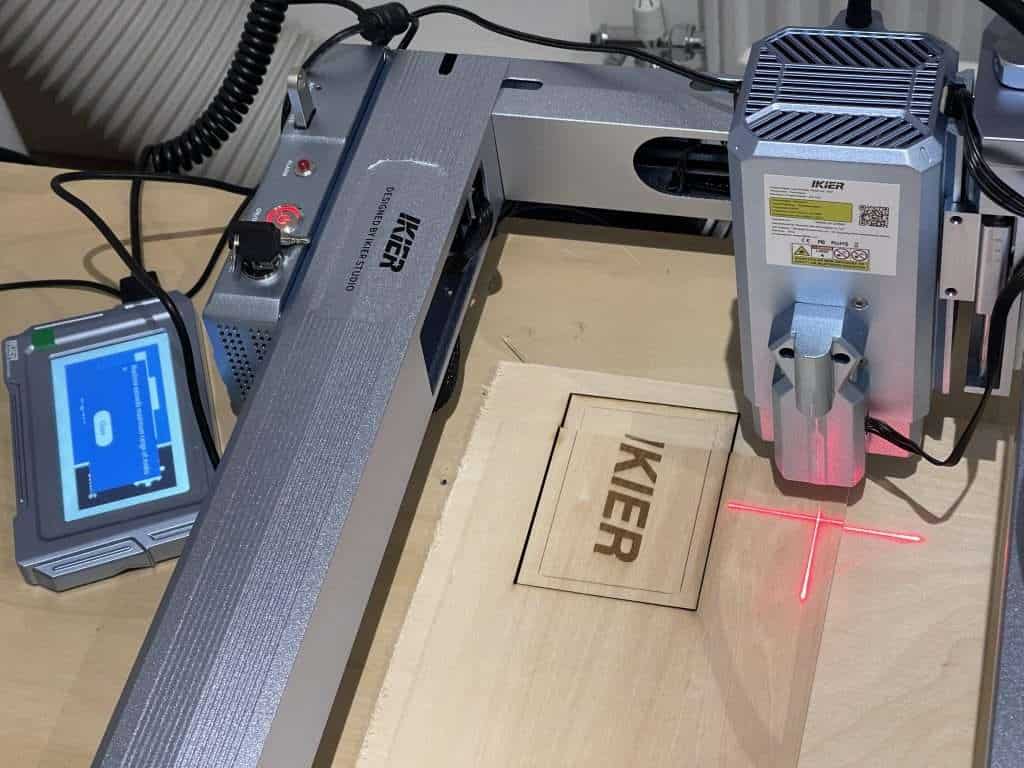
The IKIER K1 Pro Max is exactly as it is named. It is pro to the max. 48W is incredible for a diode laser, and it cuts super, super well. With multiple passes I expect it can cut some very, very thick materials.
In the above example, it cut through 3/4″ of plywood, going through the top sheet of 3mm baltic birch, into and through a 1/4″ I placed just offset below, all the way through to the sacrificial sheet that I added to protect my worktop.
But without a proper laser bed, or a better DIY solution, the results are going to be awful on the underside. There is no point in having an ultra-fast, ultra-powerful laser cutter that makes a ton of post-processing and sanding.
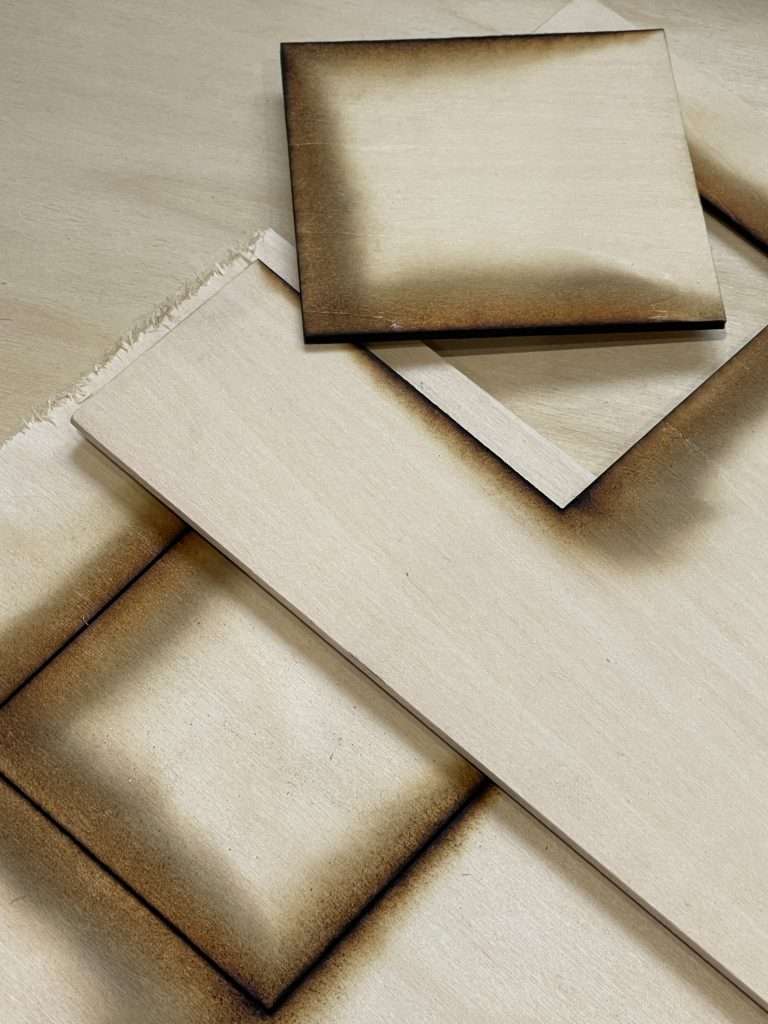
In my testing, I got close to starting a fire so that is where I stopped until I can get a safer and cleaner solution.
IKIER K1 Review: Conclusion
While I did have some difficulty getting the IKIER laser to speak to my wifi network, and the lack of a proper, safe laser bed put an end to my testing, otherwise the machine is fantastic.
The build quality is top-notch, and at 48W, I don’t know of any other diode laser that can cut the way that this one can.
Would I recommend it? Yes, but only with the addition of a laser bed, and I would highly suggest you buy an enclosure. Together, this puts the price in the ballpark of the excellent xTool S1 which is fully enclosed and vented, but slightly less powerful at 40W.

 FLUX Ador: Diode Laser Cutter with Color Printing