• Skip to main content
  • Skip to header right navigation
  • Skip to site footer
Maker Hacks

Maker Hacks

Ideas, news & tutorials for makers and hackers – Arduino/Raspberry Pi, 3D printing, robotics, laser cutting, and more

  • Home
  • About
  • YouTube
  • Recommendations
  • Contact

Make your own PEI 3D printer bed and get every print to stick!

You are here: Home / Hacks, Tips, and Tutorials / Make your own PEI 3D printer bed and get every print to stick!
FacebookTweetPin
Author: Chris Garrett

One of the reasons Prusa Mk2 and Lulzbot printers are so reliable is they have a special PEI surface to print on. In my experience it is one of the best print surfaces, needing no glue for PLA or ABS. So why should other printers miss out? Well, if your bed is smaller than 254 x 224 mm you are in luck!

I’ve gotten pretty tired of glue stick and ABS juice. It’s just a mess, and especially with the glue stick, I never seem to use just the right amount.

Dreaded glue stick
Dreaded glue stick

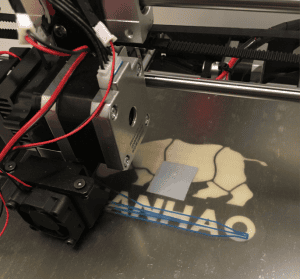
Turns out Prusa sell PEI adhesive sheets. The idea is they are replacement sheets for the Prusa should you damage your original. For some lucky people it appears they even added a spare sheet in the Prusa delivery (so I am told, I was not one of the lucky ones). As soon as my Prusa arrived I ordered two replacement sheets. Ever since I have been wondering how well it would help my Wanhao Di3, seeing as that bed is only 200x200mm. Well, today I tried it out.

Your DIY PEI 3d printer bed
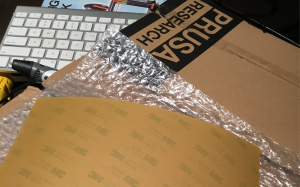
You will need:what-you-need

  1. The adhesive PEI sheet
  2. A craft knife or razor blade
  3. Isopropyl alcohol
  4. A credit card or other convenient scraper
  5. Cutting board

Thoroughly clean your print surface that the PEI is going to adhere to. I stuck mine to my glass plate but on the Prusa it is directly on the heated bed circuit board so you could try that.

Next peel back the edge of the PEI. Not too much! It’s very important you scrape any bubbles out as you stick the sheet to your bed so take it steady and do small amounts at a time.

PEI

Once the entire sheet is added, ensure no bubbles are showing. Squeeze with your scraper until you are satisfied it is completely flat.

Now you will need to cut any excess with your knife, before cleaning thoroughly with your alcohol to remove any of your finger grease.

There you have it, a PEI bed ready to attach back on your printer!

Ensure you carefully reset the z gap before printing because remember you just changed it with your 0.175mm sheet. You don’t want the z gap too close and damage your sheet right away. Before each print ensure it is clean with a wipe of isopropyl and it should be good to go, no glue necessary.

attached

Let me know how it works for you 🙂

Related

Category: Hacks, Tips, and TutorialsTag: 3d printing, prusa, wanhao
FacebookTweetPin

About Chris Garrett

Marketing Director by day, maker, retro gaming, tabletop war/roleplaying nerd by night. Co-author of the Problogger Book with Darren Rowse. Husband, Dad, 🇨🇦 Canadian.

Check out Retro Game Coders for retro gaming/computing.

☕️ Support Maker Hacks on Ko-Fi and get exclusive content and rewards!

Previous Post:Easy (and Cheap!) Craft Foam Wheels for Robots and Toys
Next Post:Upgrading the Wanhao Di3 from Good to Amazing

Sidebar

  • Facebook
  • Twitter
  • Instagram
  • YouTube

Recently Popular

  • Gweike Cloud Review
  • How to choose the right 3D printer for you
  • Glowforge Review – Glowforge Laser Engraver Impressions, Plus Glowforge Versus Leading Laser Cutters
  • Original Prusa i3 Mk3S Review
  • Best 3D Printing Facebook Groups
  • Elegoo Mars Review – Review of the Elegoo Mars MSLA Resin 3D Printer
  • Glowforge ‘Pass-Through’ Hack: Tricking the Front Flap of the Glowforge with Magnets to Increase Capacity
  • How to Make a DIY “Internet of Things” Thermometer with ESP8266/Arduino
  • Wanhao Duplicator i3 Review
  • IKEA 3D Printer Enclosure Hack for Wanhao Di3
  • Creality CR-10 3d printer review – Large format, quality output, at a low price!
  • 3D Printed Tardis with Arduino Lights and Sounds
  • Anet A8 Review – Budget ($200 or less!) 3D Printer Kit Review
  • Make your own PEI 3D printer bed and get every print to stick!
  • Upgrading the Wanhao Di3 from Good to Amazing
  • How to Install and Set Up Octopi / Octoprint
  • Creality CR-10 S5 Review

Copyright © 2023 · Maker Hacks · All Rights Reserved · Powered by Mai Theme