Full Spectrum Muse review? Isn’t the Glowforge your favourite laser cutter, Chris?
Yes, yes it is! But there are reasons we have a Full Spectrum Muse, and I will get into those in the following review.
When my wife’s lasering business started taking off (pre-lockdown), we realized we needed a bit more engraving capacity, and in particular, speed.
While we love our Glowforge machines, there is a couple of things the Muse line has over them:
- Full Spectrum machines can engrave faster – Now, since purchasing the Muse, Glowforge did increase their speed with an over the air update. In addition, the faster you engrave, the lighter the engrave, unless you have a bump in power. But still, we have found the Muse to engrave faster. Not so important for one-off engraves, but for production it adds up.
- The Muse can do rotary and has a removable bottom – While the Glowforge Pro has a pass-through, and we can trick our Glowforge Basic into “pass-in” with a hack, the Muse can engrave on any sized material (eg. a table, a door, a full 5×5′ sheet of ply …) by using a riser or just placing it on top of the item. There is a rotary attachment that takes advantage of this additional height capability so you can engrave tumblers. I managed to engrave Yeti Mugs with my Muse without a rotary, in fact!
- Internet not required – Full Spectrum do send over the air updates, and the interface is through a web browser, same as Glowforge, the key difference is all the work is done locally. If you are going to be at an event without connectivity, you can still get the job done. On the Glowforge you need cloud access.
Muse Jog Controls

Another benefit that I did not anticipate, was how often I would rely on the jog controls right on the machine, and I find I miss them on the Glowforge.
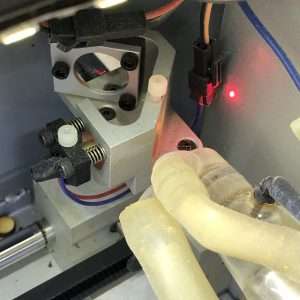
You see, the Muse has a red dot laser for aligning your design. Rather than just line up your design on the material using a photo, you can also start your engrave or cut from the center or one of the corners of a bounding box.
Even more handy, you can tell the Muse to run the perimeter, so you can see if your design will fit, and you know where it is safe to add weights or hold-downs.
So the Muse is Better than Glowforge?
Not so fast! These advantages, of course, comes at a cost.
First, financial. We could have bought two Glowforge Basic machines for the price of this one Muse.
Glowforge machines don’t need mirror alignment or focusing, whereas only the most expensive Muse can do autofocus and still need manual mirror alignment.
It also has a steeper learning curve. I would say the Muse versus the Glowforge is like Mac/iOS versus PC/Android – The Glowforge is like the Mac or iOS in that you gain a lot of ease of use and quality of life benefits at the expense of control and user serviceability. The Muse allows you much greater control and ownership, but you will need to spend more time with it before you have everything dialed in.
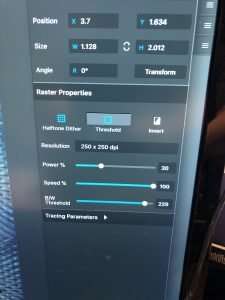
Muse versus Glowforge User Interface
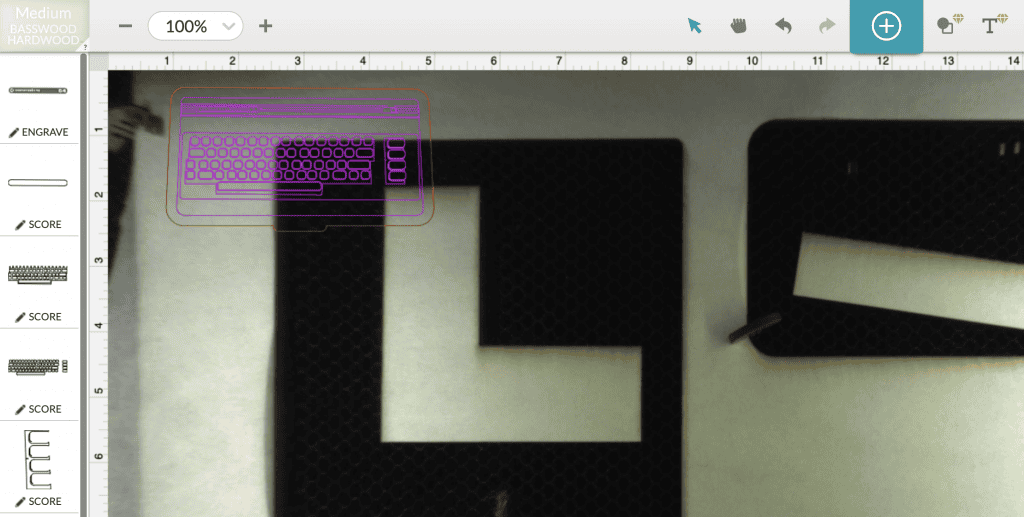
I think you will see the difference in usability just from the screenshots below.
One example is the Glowforge UI shows you all your settings and design elements:
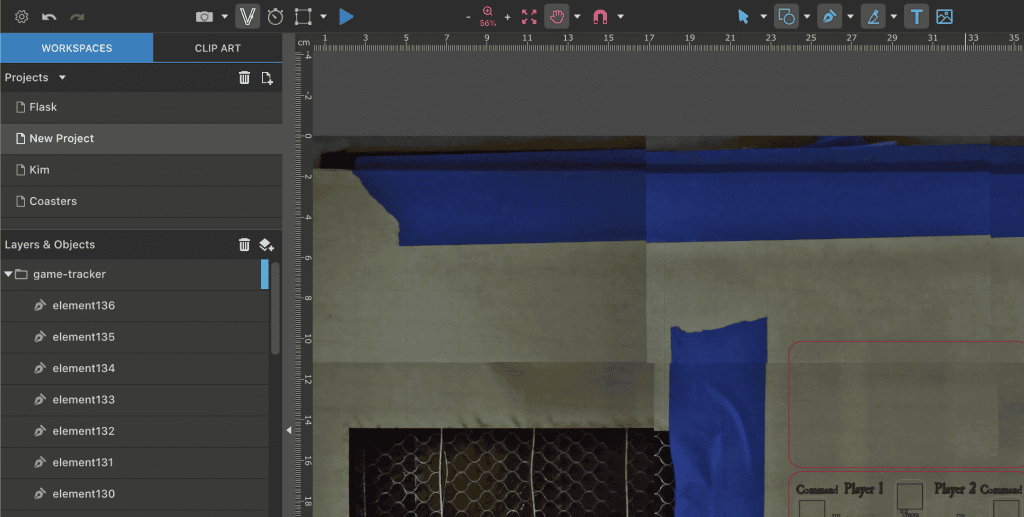
The Muse UI leaves it all up to you, there are no material presets, you can’t save your power/speeds under meaningful names, and you can’t tell what a piece of the design is at a glance:
Use this Full Spectrum Discount Code!
Use the discount code at checkout
MUSEDISCOUNT001
Get $125.00 off your purchase!
FS Muse Review the Positives
While I don’t want this Muse review to be all glowing, there are some significant benefits to the Muse:
- Lots of fine control – you have control over every aspect of the Muse, which is great for unusual materials or for achieving certain effects.
- Removable bottom so you can engrave on basically any sized material
- Mostly generic parts so more user-serviceable than some competitors
- Browser-based but not cloud-based (and even has an ethernet port)
- Perimeter check and red dot makes alignment more idiot-proof
- Jog controls on the touch-screen
- Ability save job files locally
- Basic drawing tools in the software
- Fast – ‘Turbo mode’
FS Muse Review the Negatives
A review needs negatives. Here are the main downsides of the Muse:
- Mirror alignment is a pain in the ass and never seems to get perfectly aligned
- Coolbox is expensive, noisy and the air-assist is weak
- No way to save settings for future reference or use
- Elements of your design are imported as dozens of numbered items in the UI and you have to click on each to see what it refers to.
- SVGs do not import actual size so have to use PDF
- Bed scan is really slow and disjointed
- Honeycomb mesh is badly bowed and magnets don’t stick
Suggestions to Full Spectrum
If I had a magic wand, after considering everything in this Muse Review, these are the ways I would improve the Muse:

- Bitmap crop and mask options
- Show icon thumbnails on layer parts
- File manager and folders for projects, with space free status
- Send to machine without running job (I use perimeter check as a workaround, currently)
- Engrave filled vectors without rasterizing
- When head is in wrong position or locked, should ask you what to do not expect you to quit, move the head, then go back into that feature
- Option to turn off safety message from displaying every boot
- Reboot option in UI
- Ability to save and name speed/power settings (eg. ‘3mm Home Depot Plywood’)
- Upgrade path rather than have to replace whole machine
FS Muse 2D Review – Bottom Line
So who is the Muse suited for compared to the Glowforge?
- For me, the Muse is for “power users” – people who are familiar with lasers, need a lot of granular control, don’t mind tinkering, and who will need to cut and engrave on objects that are tall or very long/wide.
- The Glowforge is for people who need convenience, are getting started, and need their machine to “just work“.
Use this Full Spectrum Discount Code!
Use the discount code at checkout
MUSEDISCOUNT001
Get $125.00 off your purchase!