
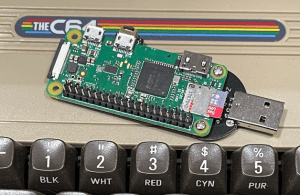
This was built on a Pi Zero W. The current model is the Raspberry Pi Zero 2 W and that is what I would use if I rebuilt it today. Affiliate link, so I get a few percent if you use it, at no extra cost to you.
If you are sick of swapping your USB stick between computers and devices to copy files, this might be the project for you!
For me, it was working on programming the Neo6502 and wifi-less recreation computers such as The A500 and TheC64.

Downloading and copying games is so much easier when you can put them directly onto the target machine too.
Perhaps you have a smart TV that can play videos over USB? Now you don’t need to give the smart TV provider 24/7 network access to your private viewing habits!
How PiUSB Works
The Raspberry Pi Zero W is the tiny sibling of the regular Raspberry Pi. While its specs are not as powerful as the larger model, it has a neat trick that makes it super useful for things like this – it can be made into a USB gadget.
In this gadget mode, it can appear as a USB device like a keyboard, game controller, even a network interface, but here we will use the feature of “mass storage” to create a removable drive.
Why a Raspberry Pi Zero W?
There are a lot of single board computers that can do this, so why choose the Raspberry Pi Zero W?
While the competition, even the Pi Pico, have the advantage of not needing an operating system to boot, and therefore would be more “instant on” (highly valuable for a USB stick), having the device show up as USB storage is only half our requirement.
We want to be able to quickly and easily copy files to the device, as well as read off of the USB.
Using SAMBA on the Raspberry Pi allows us to create a network share, so Windows, Macs, Linux, and even your iOS/Android smartphone.

Preparing the Raspberry Pi
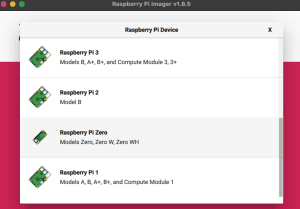
For my PiUSB I am using a first-generation Pi Zero W because it doesn’t need to be especially performant, and it was otherwise unused.
The first step in making a Raspberry Pi based USB stick is to install the slimmest operating system that you can get away with. We need it “headless”, that is to operate without a graphical interface, keyboard or mouse, and we don’t need all the bundled software, just enough.
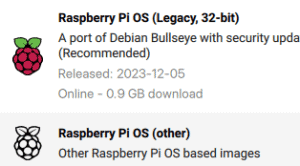
In Raspberry Pi imager we will burn a Raspbian Lite image which is found under OS (other).
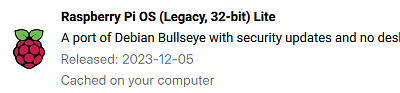
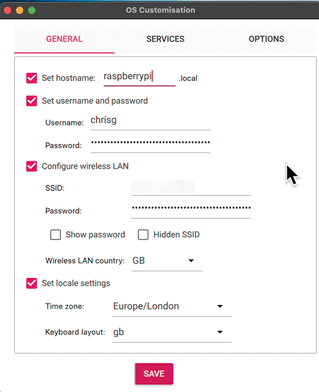
Choose an SD card, whatever size will be large enough to have a couple of gigs plus whatever capacity you want to make our USB stick appear to be.
On mine I went with a 32GB card, knowing that retro computer systems rarely need much capacity as they used cartridges, tapes and floppy disks for software distribution. Also remember, the idea is ease of swapping your media, not permanent storage!
We take our SD card and select it under the Storage button.
Hit Next but before you set the imager writing, take a moment to click “Edit Settings” and configure your password and network settings. It is much more convenient to do this now rather than later, as it will boot up on your network instead of having to set up a monitor and keyboard just to connect to wifi!
After the SD card is written, you can remove it from your card reader and insert it into the Pi for first boot.
Initial Raspberry Pi Configuration
Your Pi will boot and then after some time reboot. This is just a first time thing and from then on it is usable to connect with over SSH.
Remember we set a username and password? We will use this to log in to the Pi terminal, in my case my username is chrisg and I left the Pi to be called RaspberryPi for now:
When prompted enter your password and you should be logged in.
Now we have the opportunity to configure your Pi a little more – completely optional.
At the terminal, enter:
sudo raspi-config
You will see a screen like this one:

From here you can ensure your correct country/localisation are selected, and you can change the name of your device, eg. I chose usbstick which will appear on my network as usbstick.local

I also chose to have the Pi automatically log in to the console using my user:

Under Advanced there is an option to ensure your Pi is using your entire disk capacity but this is not necessary any longer, it is already done for you on that longer first boot.
Installing the PiUSB
At this point we have a plain, vanilla Raspbian Lite. We have some software and configurations to install.
Rather than give you a bunch of instructions to type in – there are a lot – I created a setup script. Now, understandably, people are wary of running such scripts at the best of time, but this actually runs as Root which is even riskier, so feel free to read and transcribe the instructions instead.
wget https://raw.githubusercontent.com/omiq/piusb/main/setup.sh -O setup.sh
chmod +x setup.sh
The first line takes a copy of the latest version of the PiUSB setup script from my Github repository.
Next, we make it executable before we can run it.
Setting the Disk Size
The script is set up to create a 1GB USB stick. While there are ways to resize after the fact, it is easier and less damaging on your SD card to create it at the correct size to start with!
If you edit the script (for example using nano setup.sh) you can change the number in line 32 from 1024 to how many megabytes you wish to size it as.

When you are ready, enter sudo ./setup.sh to start the setup.
It is going to do a lot so be patient, and you will see a bunch of jibberish fly up the screen interspersed with stuff like this:
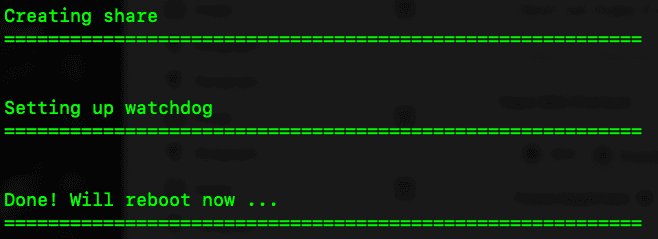
After it is all done it will reboot your Raspberry Pi, and hopefully it will appear on your network as a shared folder and also appear as a USB device that you can open and read/write.

Starting and Stopping PiUSB
Once everything is running, the operating system will not like you moving or deleting the file where all our data is stored, so you will need to disable the services.
To stop the services and unmount the drive, we can use the following commands:
sudo systemctl stop smbd.service
sudo modprobe -r g_mass_storage
sudo umount /mnt/usbstick
The first command stops the file sharing. Second we have stopping the USB mass storage emulation. Finally we can unmount our /piusb.bin file from being seen as a mounted disk.
sudo mount -a will remount the disk to be visible to the Pi.
Restarting the file sharing is done using sudo systemctl start smbd.service and to make the disk visible over USB we use sudo modprobe g_mass_storage file=/piusb.bin stall=0 ro=0
Enhancing Your PiUSB

The first enhancement is completely optional but it is cheap and adds a lot to the USB stick experience, and that is a USB dongle board for your Pi Zero.
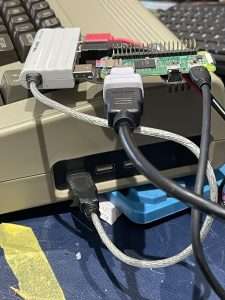
I got mine from Pi Hut, because it is solderless and strangely cheaper than purchasing the solder version on Amazon, but you can find them in lots of places.
Second enhancement I would seriously encourage you to do, and that is to power the Pi separately from the data USB port. This allows you to reboot the computer that your PiUSB is plugged into without then also powering off the Pi. As we are using SD cards, this is very vulnerable to not shutting down correctly.
On my TheC64 I am using a tiny USB hub to attach the joystick, mouse, and my PiUSB, but I am powering the Pi using the power-only usb port.
Future enhancements could be a 3D printed case, LED activity lights, and maybe the addition of networking. We will see how popular this is as it stands before I do any more work on it, it is sufficient for what I needed already!

 Neo6502 GPIO Input and Output