Ever wondered how to create your own custom keyboard or keypad? Do you want a fast way to quit out of Zoom calls?
Today we’re going to be making our own custom Arduino macro USB keyboard. Well, a two-key “keyboard”.
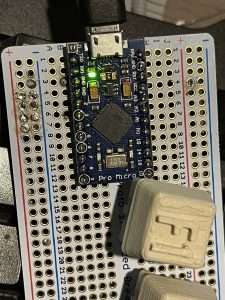
For this we’re going to use the Arduino Pro Micro. And the reason we’re using the pro micro is because the Pro Micro has a special version of the Arduino microcontroller, the ATmega32u4, as opposed to the ATmega328.
The reason this is important is the Arduino Pro Micro or the Leonardo that it’s based on, has the ability to be a HUD device, a human interface device. That means it can communicate over USB as if it’s a keyboard or a mouse. And as we’re doing a macro keyboard, keypad, whatever you want to call it, this is important.
I’m using cherry MX switches because I’m building up to create a real keyboard, but you can use any regular buttons.
This can be done really, really cheaply, or you can do a full, really luxurious keyboard and everything in between.
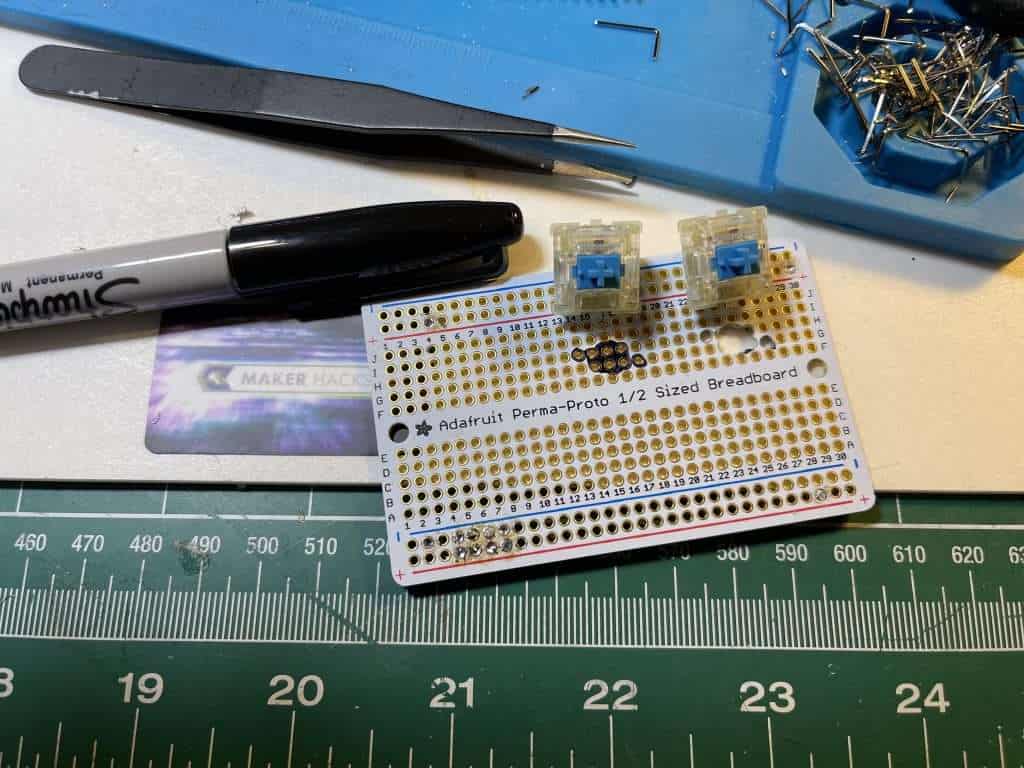
You’re going to need a breadboard or some sort of board to build upon, and some wires. Unfortunately, Cherry MX switches aren’t meant for breadboards. You’re going to need to drill some holes. I definitely should not have breathed in the dust caused when I made holes in my recycled Adafruit Perma-Proto board.
Let’s start out easy with one button first, we are just going to do “hello world”. Then we can finish off by making a key that gets us out of Zoom calls, fast!
Arduino Keyboard library
You should already have the required Keyboard library in your Arduino distribution, but if not you can grab it from the Arduino library manager. They have a bunch of useful documentation to help you, of particular interest is the Arduino reference on Keyboard Modifiers.

Programming your first “Hello World” macro key
Ignoring the fact my diagram shows an Arduino Uno instead of an Arduino Pro Micro or Leonardo, wire up your button or key switch to Ground and to Pin 2.

In the code we first include the Keyboard.h library mentioned earlier, this has all the stuff we need to send the correct keyboard codes.
#include "Keyboard.h"
Next we need to set up which pin our key/button/switch is connected to, and to set it as an input but with a Pullup. Saying “pull-up” tells the Arduino to connect the pin internally to 5v.
#define KEY_PIN 2
pinMode(KEY_PIN, INPUT_PULLUP);
For the Arduino to start emulating a keyboard, we need to tell it to begin:
Keyboard.begin();
When the button is pressed, it will be pulled down to Ground via the Ground connection we made:
if (digitalRead(the_pin) == LOW)
In the full code we use Keyboard.Write and also Keyboard.Print.
Write sends a single keypress, and we can specify a literal letter/character, or one of the special codes – in this case the Return key.
We also can send a full string, which is how we send the phrase “Hello World!”. Behind the scenes the Arduino Keyboard library does the heavy lifting of pretending we made the appropriate key presses.
To signify that our “hands” have left the keyboard, we Release All.
  Keyboard.write('H');

  Keyboard.print("Hello World!");

  Keyboard.write(KEY_RETURN);

  Keyboard.releaseAll();
Hello World Keyboard Macro Code
/********************************************
  USB Keyboard Hello World
  MakerHacks.com 12/2020
*********************************************/

// The library that does the magicx
#include "Keyboard.h"

// Right now our "keyboard" has one key
#define KEY_PIN 2


void setup()
{

  // First we need our input pin
  // We use the built-in pullup
  // that means when it is connected to ground
  // we know the key has been pressed
  pinMode(KEY_PIN, INPUT_PULLUP);

  // Start watching the "keyboard"
  Keyboard.begin();
}

void loop()
{

  // We need to check the pin for Ground
  if (KeyPressed(KEY_PIN))
  {
    // Do our Hello macro
    do_the_thing();
  }
  else
  {
    // We wait, do nothing
    delay(100);
  }

}

// This is our Hello World macro
// We have various options for key-sending
void do_the_thing()
{

  // .write is like pressing and releasing
  // capitals are handled automagically
  Keyboard.write('H');
  delay(100);
  Keyboard.write('e');
  delay(100);
  Keyboard.write('l');
  delay(100);
  Keyboard.write('l');
  delay(100);
  Keyboard.write('o');
  delay(100);

  // Rather than send each keypress individually, we can send whole strings
  Keyboard.print("Hello World!");

  // You can also send "modifiers" and special keys, eg. hit return
  // https://www.arduino.cc/reference/en/language/functions/usb/keyboard/keyboardmodifiers/
  // For multiple key presses we will use several Keyboard.press() calls
  Keyboard.write(KEY_RETURN);

  // Just in case any keys are "down"
  Keyboard.releaseAll();
  delay(100);
}

// This will be our function that returns if a key was pressed HelloHello World!
bool KeyPressed(int the_pin)
{
  if (digitalRead(the_pin) == LOW)
  {
    return true;
  }
  else
  {
    return false;
  }
}
Quit Zoom Call Macro Key
Again, apologies for the circuit diagram being an Arduino Uno instead of the actual board we need!

Adding another key is simple at this stage, we can use another pin (pin 3). Again it needs a pull-up.
To quit a Zoom call, it seems we use Command/Apple + W on Macs, which in the Arduino Keyboard library is the GUI key. On Windows I think you would need Alt+F4.
  Keyboard.press(KEY_LEFT_GUI);
  Keyboard.press('w');
  delay(100);
  Keyboard.releaseAll();
As mentioned in the video, I haven’t tested this with a call I didn’t initiate, but it seems we also will need to hit Return if we want to completely quit the call:
  Keyboard.press(KEY_RETURN);
  Keyboard.release(KEY_RETURN);
  delay(100);
Quit Zoom Call Arduino Keyboard Macro Code
/********************************************
  USB Keyboard Hello World, Goodbye Zoom!
  MakerHacks.com 12/2020
*********************************************/

// The library that does the magicx
#include "Keyboard.h"

// Right now our "keyboard" has one key
#define KEY_PIN 2

// If we select another pin, we can have another function
#define ZOOM_PIN 3


void setup()
{

  // First we need our input pin
  // We use the built-in pullup
  // that means when it is connected to ground
  // we know the key has been pressed
  pinMode(KEY_PIN, INPUT_PULLUP);

  // Our secondary input ...
  pinMode(ZOOM_PIN, INPUT_PULLUP);

  // Start watching the "keyboard"
  Keyboard.begin();
}

void loop()
{

  // We need to check the pin for Ground
  if (KeyPressed(KEY_PIN))
  {
    // Do our Hello macro
    do_the_thing();
  }
  // Check if the Zoom key has pressed
  else if (KeyPressed(ZOOM_PIN))
  {
    // Do our ZOOM macro
    pull_the_pin();
  }
  else
  {
    // We wait, do nothing
    delay(100);
  }

}

// This is our Hello World macro
// We have various options for key-sending
void do_the_thing()
{

  // .write is like pressing and releasing
  // capitals are handled automagically
  Keyboard.write('H');
  delay(100);
  Keyboard.write('e');
  delay(100);
  Keyboard.write('l');
  delay(100);
  Keyboard.write('l');
  delay(100);
  Keyboard.write('o');
  delay(100);

  // Rather than send each keypress individually, we can send whole strings
  Keyboard.print("Hello World!");

  // You can also send "modifiers" and special keys, eg. hit return
  // https://www.arduino.cc/reference/en/language/functions/usb/keyboard/keyboardmodifiers/
  // For multiple key presses we will use several Keyboard.press() calls
  Keyboard.write(KEY_RETURN);

  // Just in case any keys are "down"
  Keyboard.releaseAll();
  delay(100);
}

// This will be our function that returns if a key was pressed HelloHello World!
bool KeyPressed(int the_pin)
{
  if (digitalRead(the_pin) == LOW)
  {
    return true;
  }
  else
  {
    return false;
  }
}


// Let's make a macro that quits out of zoom.
// I use a mac for work so I need Command(⌘)+W
// in this library we need to use KEY_LEFT_GUI
// (which is the Apple/Windows key)
// We get the combo from
// https://support.zoom.us/hc/en-us/articles/205683899-hot-keys-and-keyboard-for-zoom
void pull_the_pin()
{

  // Keyboard.press() all the required keys
  // ?+w
  Keyboard.press(KEY_LEFT_GUI);
  Keyboard.press('w');
  delay(100);
  Keyboard.releaseAll();

  // Now if we initiated, we can end for all (just hit Return)
  // or do we want to quit for us? (Tab then Enter)
  Keyboard.press(KEY_RETURN);
  Keyboard.release(KEY_RETURN);
  delay(100);
}
3D Printing the Cherry MX Keys

You can grab my Cherry MX keycap STLs from here. Eventually I will be printing them in resin, but for now I am using Commodore Beige and printing draft on my Prusa :)

