I have been writing a lot more about Raspberry Pi than Arduino lately, but don’t get the impression I am leaving the Arduino world behind. Both devices have their benefits, and in fact, I believe they work really well together.
Let’s take a look at the easiest way to do that!
One of the Grove add-ons I bought recently was a very nice LCD display. Unfortunately, this display doesn’t have a Raspberry Pi library yet.
Now, of course, I can look at the Arduino library and figure it out, it is just i2c, but this is a nice opportunity to demonstrate how you can offload hardware to Arduino and leave the Pi to do the brainy stuff.
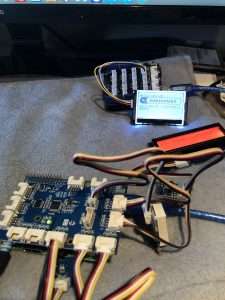
First, we connect the Pi and the Arduino via USB. Ensure Serial is enabled in your Raspi-Config too.
Arduino Side

On the Arduino we can do some very simple LCD code (Gist here):
#include
#include

I2C_LCD LCD;
extern GUI_Bitmap_t bmlogo; //Declare bitmap data package.
uint8_t I2C_LCD_ADDRESS = 0x51; //Device address configuration, the default value is 0x51.

String instring;

void setup(void)
{
Serial.begin(9600); // opens serial port, sets data rate to 9600 bps
Wire.begin(); //I2C controller initialization.
LCD.CleanAll(WHITE); //Clean the screen with black or white.

// bitmap dispaly mode.
LCD.WorkingModeConf(ON, ON, WM_BitmapMode);

// display logo
LCD.DrawScreenAreaAt(&bmlogo, 0, 8);

// character mode
LCD.WorkingModeConf(ON, ON, WM_CharMode);

// 8*16 font size, auto new line, black on white background
LCD.FontModeConf(Font_6x8, FM_ANL_AAA, BLACK_BAC);
}

void loop(void)
{

LCD.CharGotoXY(0,0);
LCD.print("Hello World:");

while(Serial.available()) {

instring = Serial.readString();// read the incoming data as string

Serial.println(instring);

//Set the start coordinate.
LCD.CharGotoXY(0,32);
LCD.print(instring);

}
}
That should be mostly straightforward to read, but look out for the parts where the Arduino is waiting for input over serial, and sends whatever it is given to the LCD.
Raspberry Pi Side
Over on the Pi, we first add the serial module with
pip install serial
and make a note of the serial port from your Arduino screen as that is what we will send data too (ensuring the Arduino IDE is closed).

If you get any permissions errors then check your groups as you might need to add your user to the dialout group with sudo usermod -a -G dialout pi (where pi is my username).
As a last resort, try
sudo chmod 777 /dev/ttyACM0

sudo chown pi:pi /dev/ttyACM0
The Python code is really simple (Gist here):
import serial
import time
from datetime import datetime

print("Starting ...")

tardis = serial.Serial('/dev/ttyACM0', baudrate=9600)

while(1):
    tardis.write(str(datetime.now()).encode())
    time.sleep(10)