• Skip to main content
  • Skip to header right navigation
  • Skip to site footer
makerhacks-logo

Maker Hacks

Ideas, news & tutorials for makers and hackers – Arduino/Raspberry Pi, 3D printing, robotics, laser cutting, and more

  • Home
  • About
  • 3D Printing
  • Laser Cutting
  • YouTube
  • Free Arduino Course
  • Recommendations
  • Contact

Arduino Stepper with Potentiometer Speed Control

You are here: Home / Electronics and Hardware / Arduino Stepper with Potentiometer Speed Control
FacebookTweetPin
Author: Chris Garrett

For my 3D printed turntable I obviously need some way to turn the turntable, and preferably for video and scanning, some method to control speed.

Fortunately, I have a whole box full of those cheap and ubiquitous stepper motors, the 28YBJ-48 plus the ULN2003 driver board.
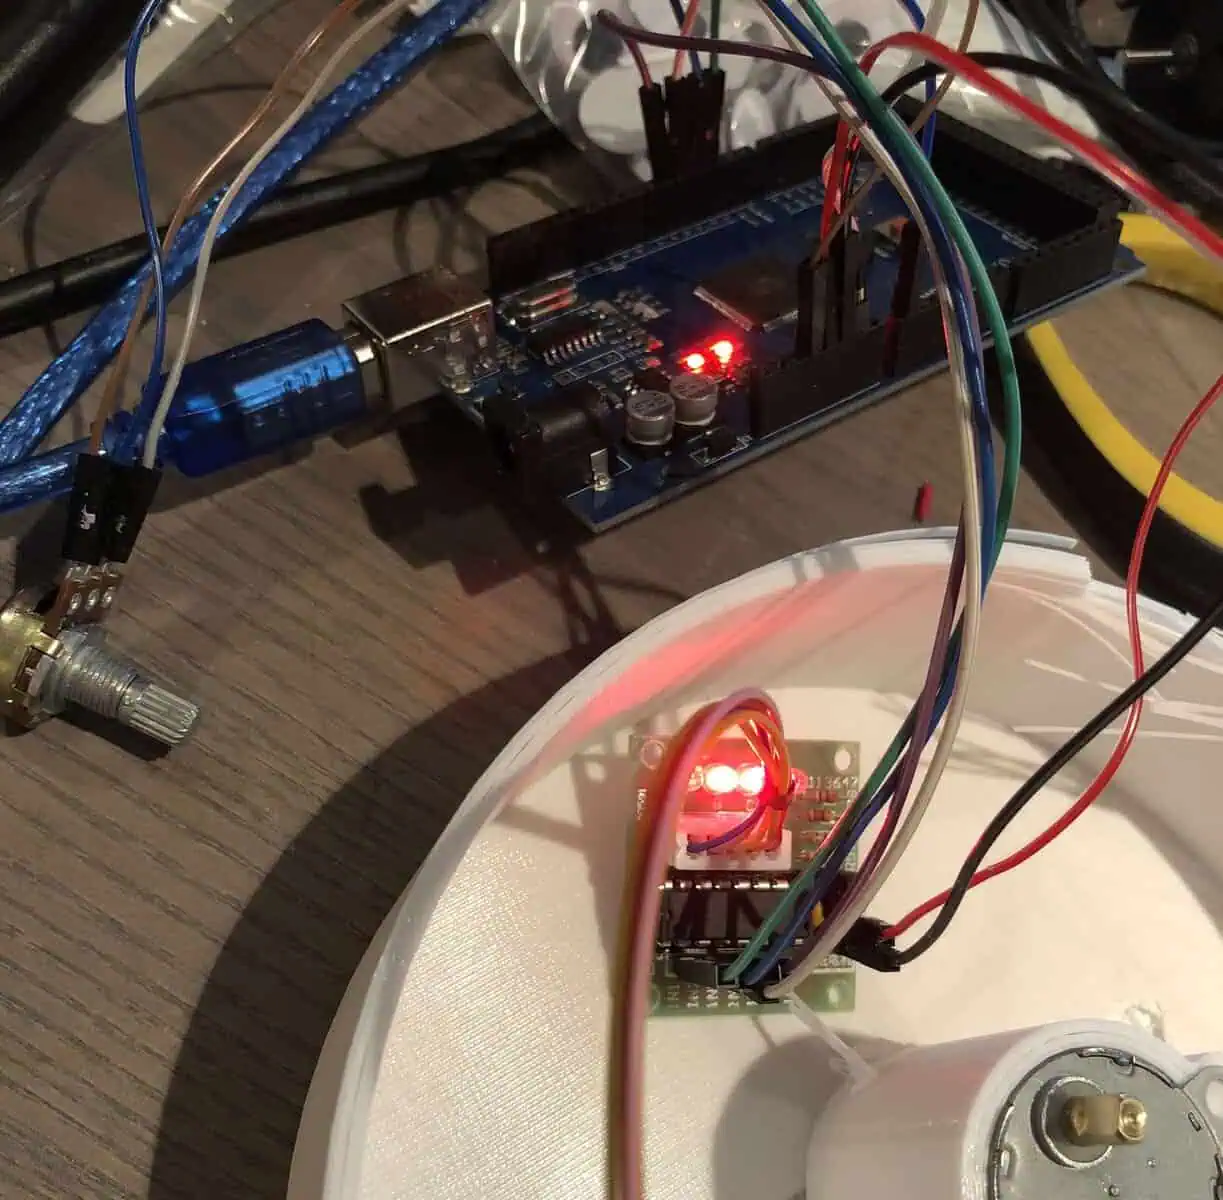
28YBJ-48 and the ULN2003. Stepper motor under Arduino control

These guys are 5v DC, the boards accept 5-12v, but each 28YBJ-48 motor can draw up to 320mA, so while initially, you can use 5v, we will use external power attached to the 5-12v in, and ground attached to our battery pack and our Arduino.

To control the motor the stepper attaches to the driver board with 4 data lines and power. Our Arduino connects four pins, (3, 5, 4 and 6) to IN1-IN4 on the ULN2003 controller board.

Our potentiometer supplies an analog signal which we attach to A0, 3v and ground.

View this post on Instagram

A post shared by Maker Hacks DIY Projects ?? (@maker_hacks)

Arduino C Code

Also find the code at this Gist


//Arduino stepper library
#include <Stepper.h>

// different steppers have different
// amount of steps to do a full
// turn of the wheel.
#define STEPS 32

// connections need to be done carefully
// In1-In4 are added in the sequence 1-3-2-4
Stepper stepper(STEPS, 3, 5, 4, 6);

// the number of steps to take
int numSteps;

// Only serial to setup here
void setup() {

  Serial.begin(115200); // start serial
  
}


// loop runs constantly
void loop() {

  // full revolution
  numSteps = (STEPS * 64) /100;

  // max power is 1024
  stepper.setSpeed( getMotorSpeed() );
  
  // take the steps
  // you can reverse direction with -numSteps
  stepper.step(-numSteps);
 

}

int getMotorSpeed() {

    // read the sensor value:
  int sensorReading = analogRead(A0);
  Serial.println(sensorReading);
  
  // map it to a range from 0 to 1024:
  int motorSpeed = map(sensorReading, 0, 769, 0, 1024);
  
  // set the motor speed:
  if (motorSpeed > 0) {
    return motorSpeed;
  }

}


Category: Electronics and HardwareTag: arduino, Hacks, making, robots
FacebookTweetPin

About Chris Garrett

Marketing nerd by day, maker, retro gaming, tabletop war/roleplaying nerd by night. Co-author of the Problogger Book with Darren Rowse. Husband, Dad, ?? Canadian.

Check out Retro Game Coders for retro gaming/computing.

☕️ Support Maker Hacks on Ko-Fi and get exclusive content and rewards!

Previous Post:raspberry pi security camera Raspberry Pi Security Camera
Next Post:5 Best Tools for Makers of 2018

Sidebar

  • Facebook
  • Twitter
  • Instagram
  • YouTube

Join the Newsletter

Sign up and get a free Arduino course + more!

Subscription Form

Recently Popular

  • xTool S1 Review
  • xTool P2 Review (first look)
  • IKIER K1 Pro Max Review
  • Gweike Cloud Review
  • How to choose the right 3D printer for you
  • Glowforge Review – Glowforge Laser Engraver Impressions, Plus Glowforge Versus Leading Laser Cutters
  • Flux Ador
  • Prusa i3 Mk3S Review
  • Best 3D Printing Facebook Groups
  • xTool D1 Pro Laser Cutter Review
  • Elegoo Mars Review – Review of the Elegoo Mars MSLA Resin 3D Printer
  • Glowforge ‘Pass-Through’ Hack: Tricking the Front Flap of the Glowforge with Magnets to Increase Capacity
  • How to Make a DIY “Internet of Things” Thermometer with ESP8266/Arduino
  • Wanhao Duplicator i3 Review
  • IKEA 3D Printer Enclosure Hack for Wanhao Di3
  • Creality CR-10 3d printer review – Large format, quality output, at a low price!
  • 3D Printed Tardis with Arduino Lights and Sounds
  • Anet A8 Review – Budget ($200 or less!) 3D Printer Kit Review
  • Make your own PEI 3D printer bed and get every print to stick!
  • Upgrading the Wanhao Di3 from Good to Amazing
  • How to Install and Set Up Octopi / Octoprint
  • Creality CR-10 S5 Review
  • Glowforge Air Filter Review
  • Thunder Laser Review

30 Days to Arduino

Arduino Tutorials
  • 3D Printing
  • CNC
  • Electronics and Hardware
  • Laser Cutting
  • News and Reviews
  • Software and Programming

arduino budget cad cnc diode laser glowforge Hacks Ideas laser cutter linux Makes making python raspberry pi resin Reviews technology tips xTool Lasers

.

Maker Hacks Blog Copyright © 2026 · All Rights Reserved · Privacy Policy