
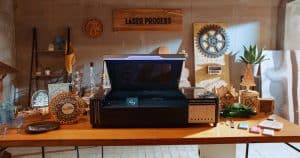
AtomStack Hurricane laser reviews will be popping up a lot over the next week as they sent out a bunch of their brand new CO2 machines to a bunch of people to try them out before their big launch.
I was one of the lucky few to get my hands on one of these pre-release machines to give feedback so that AtomStack could perfect their product ready for the general public.
How did the AtomStack … stack up? (sorry).
Let’s find out!
AtomStack Hurricane Overview
AtomStack is a well-known company in the laser engraving industry, having been around for ten years, with their first laser engraving machines arriving around four years ago.
Their diode lasers, the A5 20W and A5 PRO 40W were very well received, especially on Amazon US, UK, and Germany.
Enter the AtomStack Hurricane, their first desktop CO2 laser.
Unlike the previous AtomStack models, it is a 55W CO2 laser cutter, putting up against (of course) Glowforge, but also the brilliant xTool P2, and the budget-friendly Gweike Cloud and OMTech Polar.
Why CO2?
You might wonder why they came out with CO2 lasers when they have done so well with their diode machines.
Well, CO2 can engrave different materials, including transparent acrylic that diode lasers are incapable of.
Also once you get into these power ranges, the CO2 provides a better beam quality and delivers higher power in a more focused point due to the fact diode lasers have to combine multiple lower-powered beams to get an increase in wattage.
Key Features of the AtomStack Hurricane:
AtomStack did their research on what customers expect of their desktop CO2 lasers in 2024, they basically hit every point on the must-have checklist:
- 55W CO2 laser
- 500x300mm working area (Can be extended to 800x500mm with a conveyor feeder)
- Autofocus
- 5MP camera for visual positioning
- Wifi and USB (though I could only test the latter at the time of writing)
- Engraving speed 600mm/s
- Power loss recovery
- Free AtomStack Software and LightBurn compatible
- Fire detection, auto-extinguishing, and secure locks for safety
AtomStack Hurricane User Experience

These desktop lasers, while smaller than their industrial counterparts, are still not exactly little so I did my homework while preparing for the delivery.
I say this so you will understand how surprised I was when this turned up!
Fortunately, in a mixup, I had been delivered two machines on one pallet, although the paperwork did say A and B of one delivery so in theory I could have kept both, heh.
Purely coincidentally I recognized the person the other machine was intended for – James Dean Designs of YouTube fame – and organized reshipping.


While LightBurn compatibility is vital for many people, and AtomStack has provided a configuration file to make that simple, I do love that AtomStack has offered its own free and easy-to-use software for this machine.
Having an easy-to-use onramp for laser users, especially people new to lasers, will become increasingly important and a competitive advantage as xTool and Glowforge have shown.
The free software is sufficient for all but the most detailed needs while missing some design-focused features. I don’t think this is an issue at all because they will continue to develop the software, I do my actual designs in CAD or Adobe Illustrator anyway, and there is LightBurn for power users as mentioned.
You can even talk to the machine from iOS and Android apparently, but that wasn’t something I bothered to look into.
Firmware updates are easy too. Simply download the update to the USB stick provided and boot the machine with the USB inserted.

Here you can see the emergency stop and the security key. I just leave all my keys inserted and in the ‘on’ position, but I know that schools and maker spaces do like to prevent unauthorized or unsupervised access to their powerful tools, so this is good to see.
One thing this machine has that I haven’t seen before is a built-in fire suppression system. I am looking forward to finding out more about that.
A Series of Unfortunate Events

Knowing someone else testing the machine was great news because it gave me someone to bounce questions off. I do wish though I had kept the top machine because mine had been through some stuff!
Don’t get me wrong, the machine had been packaged extremely well, but I think between the unit being pre-production and the delivery not being optimal, my machine being the one nearest the floor took the brunt of the action and suffered for it.
I’m grateful the damage was easy to work around. Mainly there is a part that mounts the switch to detect if the crumb tray is in place, and the mirrors were out of alignment.
Seeing as the crumb tray doesn’t impact using the machine, and the rain was starting to seriously threaten my garage, I focused on aligning the mirrors.
Mirror alignment might sound daunting but it is something every laser owner with a machine like this should know, and them being way out of whack allowed me to learn how that works on this machine.
Mirror Alignment on the AtomStack Hurricane

How can you tell your mirrors are out of alignment?
Sometimes it is subtle, like the far bottom right has slightly lighter engraves than the top left.
Very often people only realize when they compare cutting parameters against another owner of the same machine and find they have to run slower and on higher power to get the same results.
In this case, there was no mistaking the issue:
That is the before, now look at the after:

This was after a very quickly eyeballed mirror alignment using the red dot as a guide.


I will come back and give the machine a much more thorough checkover and realignment after moving it to our new workshop. I’m sure during transit things will get shaken up again.
AtomStack Hurricane in Action

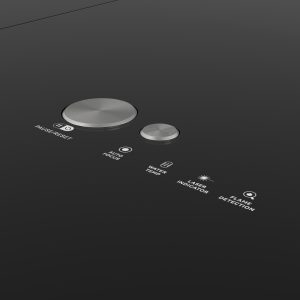
The AtomStack Hurricane has several safety features, and the first you will encounter is around cooling.
Unlike the old days where you would be given some tube and an aquarium pump (if you were lucky), this machine has cooling built in but you still have to fill it.
Using antifreeze and distilled water, mixed appropriately for your climate, you fill up the tank using the supplied funnel. Add around a liter, fire it up, ensure there are no puddles, then fill it up to the top.
I would advise getting some help with this as the machine is heavy and on my unit, I needed to give it a little tilt to ensure the liquid went in the machine rather than on the floor.

This machine does have air assist and autofocus. You can see in the picture above with the protective case removed that a stepper motor drives the Z up and down until a pin triggers the switch.
You can perform the focus using a button on the machine or from gcode, but you can also manually focus (for example if the material is not flat) using a knob on the Z and a focus block set for an 8mm offset.

In trying to get a material test via LightBurn I repeatedly had an issue where LightBurn would ignore the autofocus during homing, driving the head into the honeycomb laser bed.
Using the AtomStack software, and in general LightBurn operation, there were no issues as I could always autofocus over the material.

I spent so much time working on the shipping issues I haven’t yet had the chance to do anything with it other than run off a barrage of tests, but what I have done with the laser has given me confidence that it will do very well.
Running off various cuts on 3mm plywood was a breeze, and 5mm plywood went extremely smoothly once the mirrors were even roughly aligned. The results went from cut through but scorched to cut cleanly in one pass and with no scorch marks.
AtomStack Hurricane Review Conclusion
While I have not put a lot of laser hours into the machine yet, and my unit is a pre-production model, I have to say everything I have seen so far adds up well.
The AtomStack Hurricane has everything you need in a desktop CO2 laser cutter; 55W power, 500x300mm working area, autofocus, red dot, camera, LightBurn compatibility, and choice of USB or Wifi. I’m sure AtomStack has another hit on their hands!
Use the code makerhacks to get 5% off your order!


