One of the many productivity-boosters my nerd friends look to is text expanders and keyboard shortcuts.
You know, enter a combination of keypresses, and out pops a signature, particular animated gif, or an often-used regular expression.
I was about to launch into setting something like this up, and then Amazon Prime Day reminded me of the Elgato Stream Deck. It’s a box of buttons for automating tasks using macros, usually as the name implies, for streaming shows for things like switching cameras and moderating the chat.
Yeah, it’s pretty neat, but just look at the price.
Could I create (bodge) something more basic for cheap? Heck yeah I can!
One of my mini-projects on my Steemit build blog was a mouse emulator using the accelerometer on the Circuit Playground Express.
For this, however, the Raspberry Pi offers more possibilites, especially if down the line I want to mimic the sneaky way the Elgato gets those graphical buttons.
Thank you Random Nerd
One of the wonderful things about the Raspberry Pi community is if you can think of a project, someone out there has done at least part of it.
This project was greatly helped by Random Nerd Tutorials. This article did most of the heavy lifting! Just follow the instructions to get your HID set up.
Next thing I needed was the codes for the keypresses I had in mind, and to wire up my big-assed button.
Sending Keyboard character codes
Using this document (Table 12) you can see each keyboard entry has a code. The system of communicating as a keyboard over USB requires these codes as part of an 8 byte message.
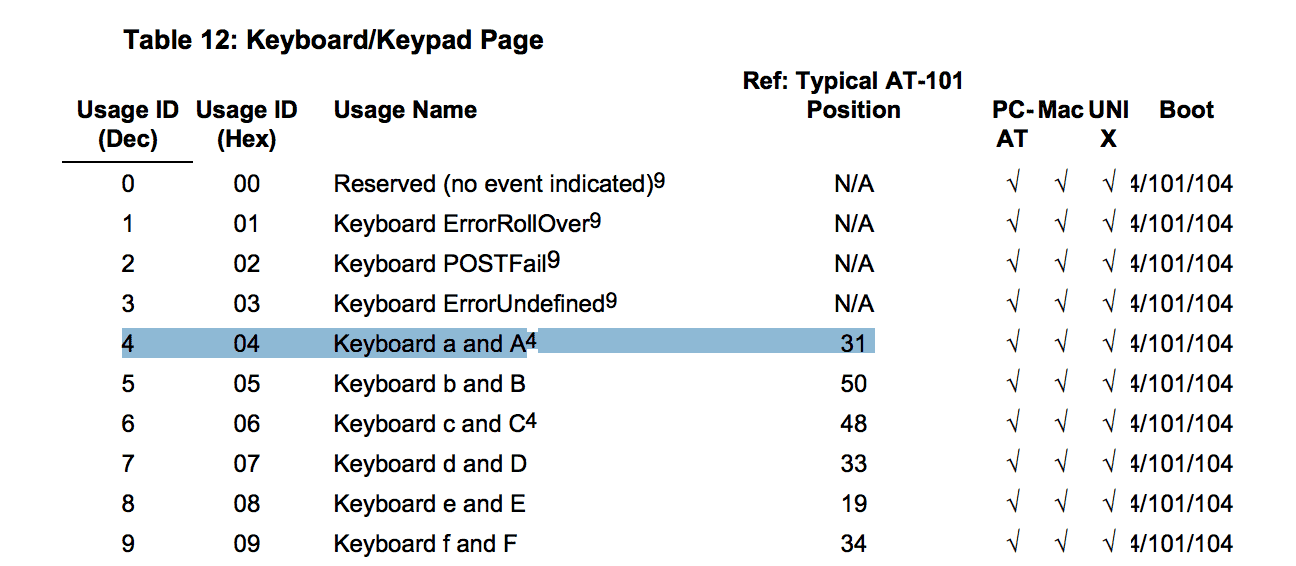
So to send the letter ‘a’, you would need to send the character code 4.
But how do you send upper case ‘A’? Or combinations such as CTRL-C?
This article provided the answer.
Input reports (sent from keyboard to computer) have the following structure for a total of 8 bytes:
- 1 byte: modifier keys (Control, Shift, Alt, etc.), where each bit corresponds to a key
- 1 byte: unused/reserved for OEM
- 6 bytes: pressed key codes
Further into the article, there is a list of the modifiers, each represented by a bit:
Left Control: 224 (0x00e0)Left Shift: 225 (0x00e1)Left Alt: 226 (0x00e2)Left Meta (Windows key): 227 (0x00e3)Right Control: 228 (0x00e4)Right Shift: 229 (0x00e5)Right Alt: 230 (0x00e6)Right Meta (Windows key): 231 (0x00e7)
For firing my screenshot app, I need CMD-SHIFT-5, so I need to set the 2nd and 4th bits on.
0b01010000
Buttons!
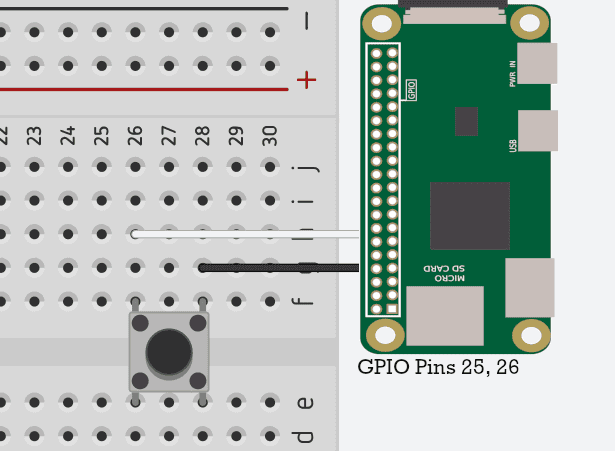
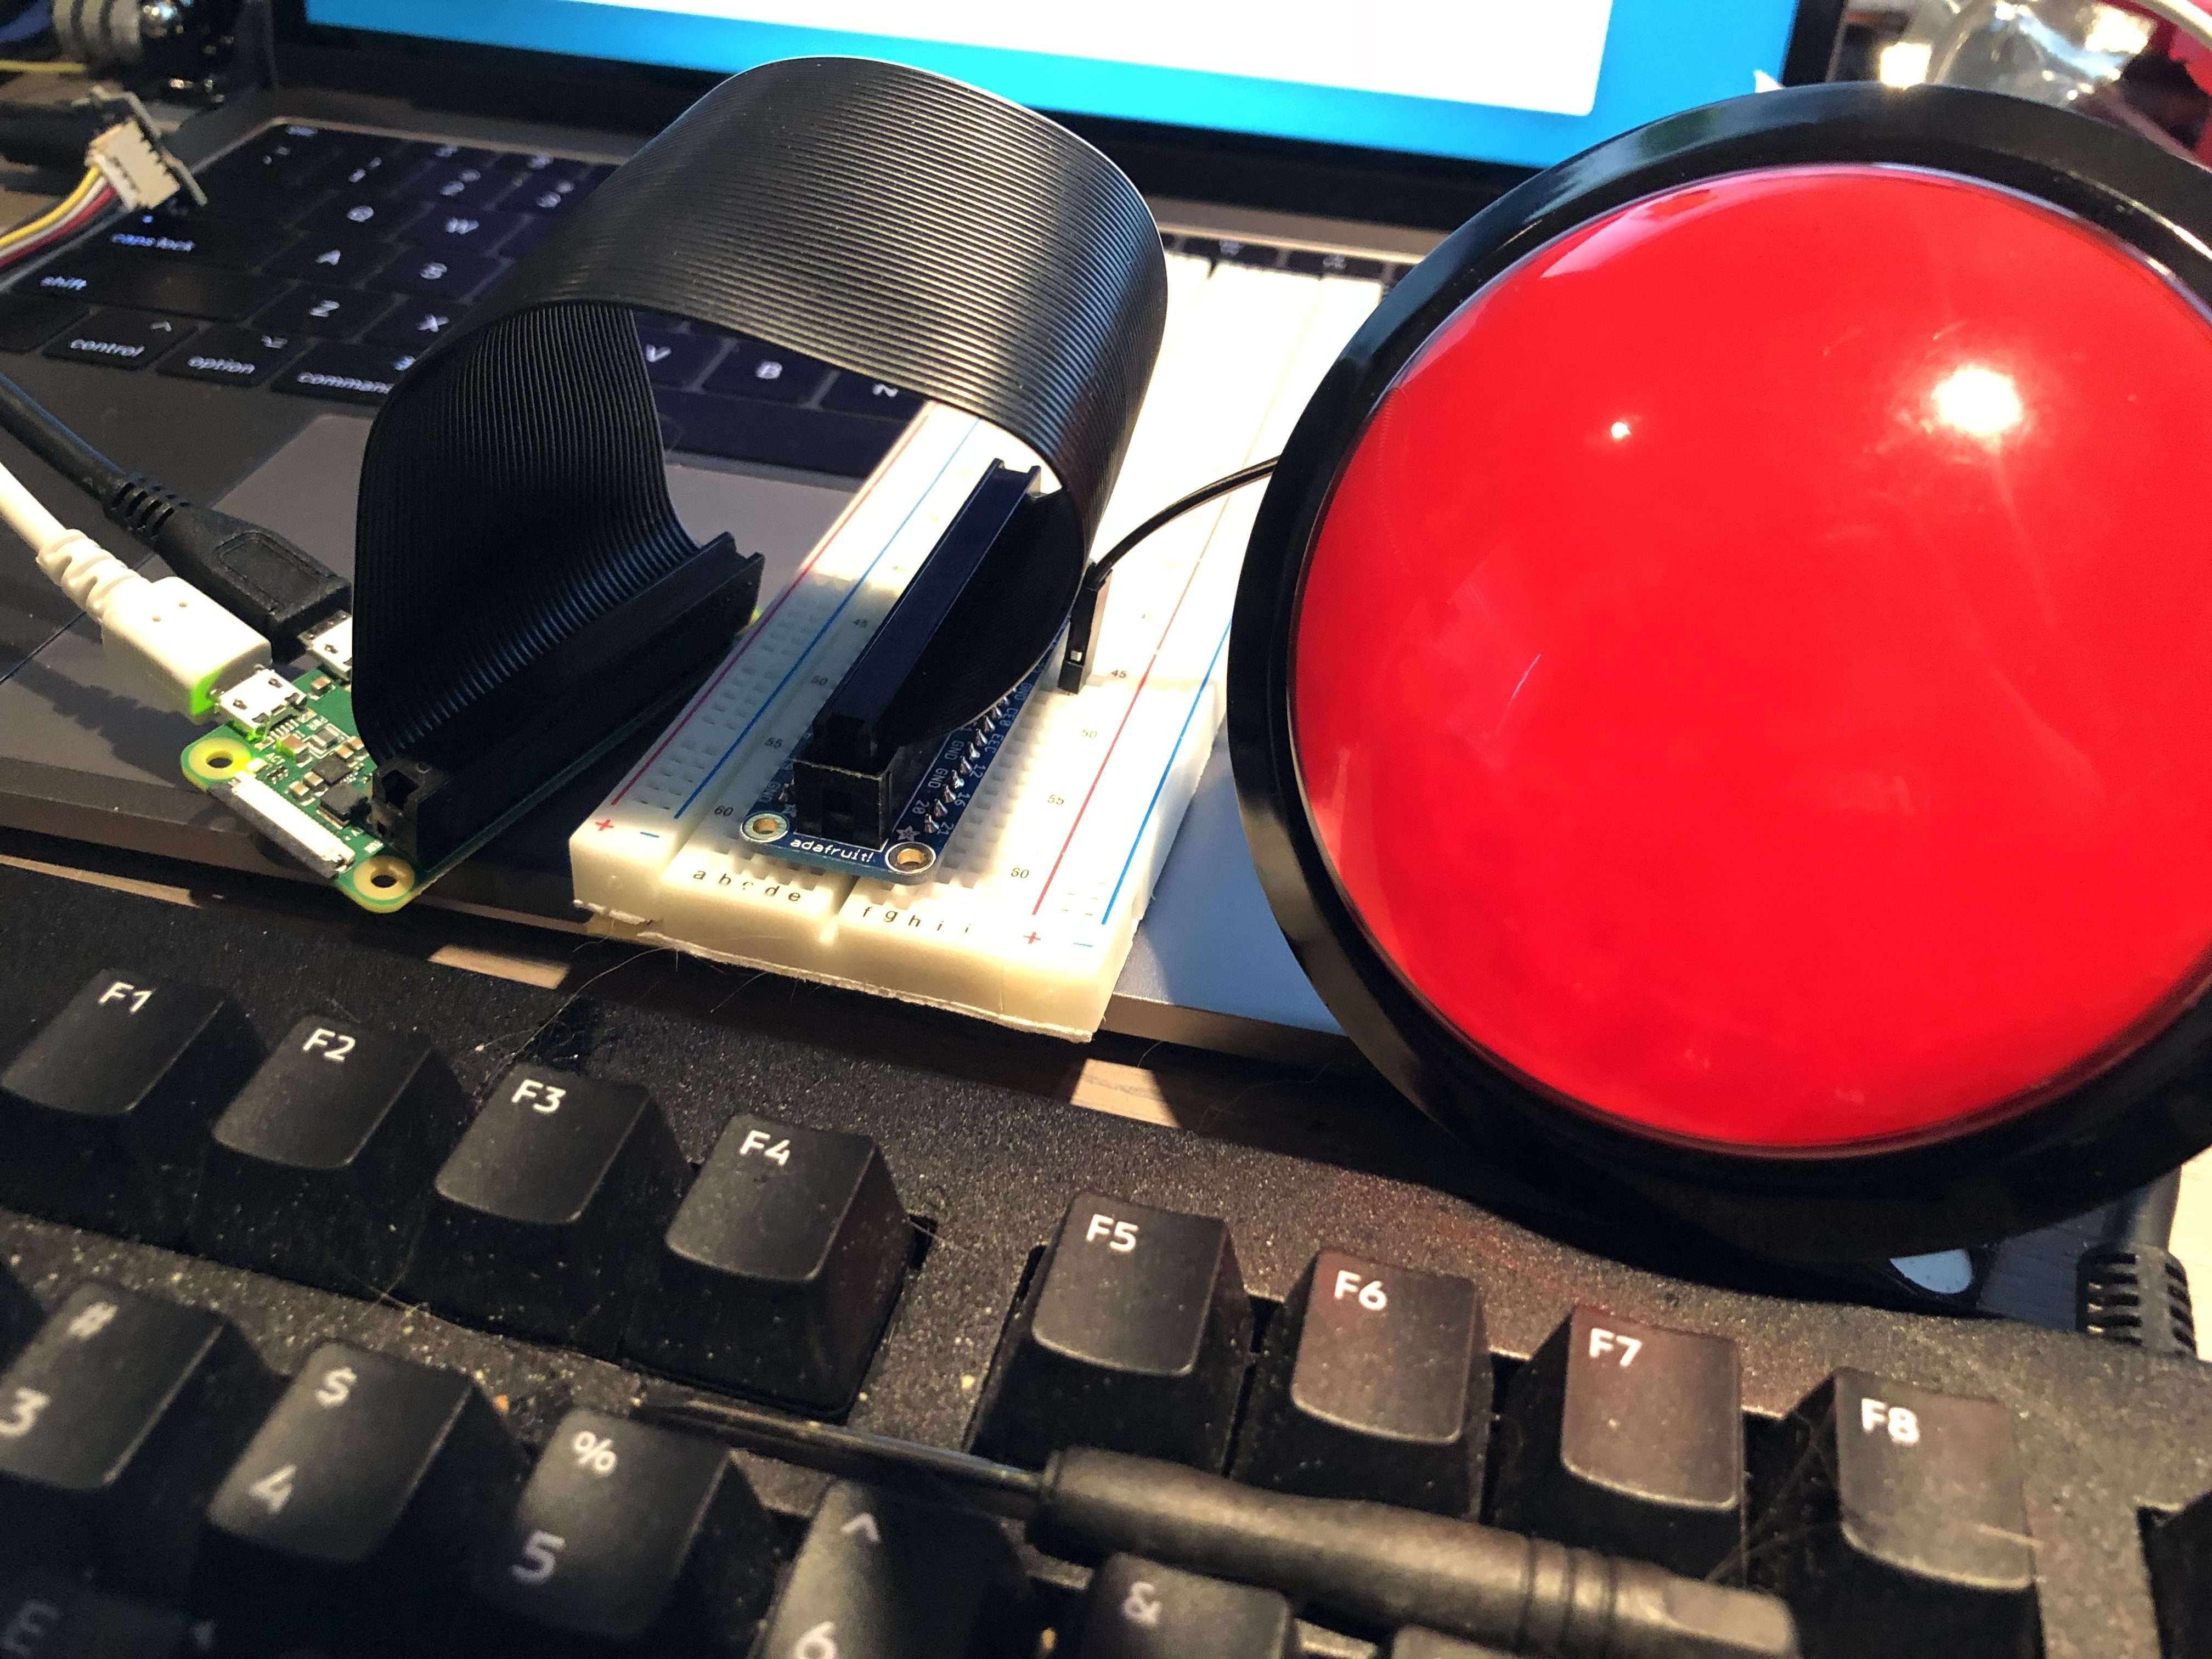
You don’t need an obnoxiously large red button like mine, any push button will do. In fact, you could just use wires and tap them together. The code just needs to see if the two pins are connected or not.
We simply connect one digital pin and ground. For my project, I chose pins 25 and 26.
Obviously, the Pi Zero needs to be connected to your computer with USB.
Code
All that is left is the code. As mentioned above, it takes heavily from the article I linked earlier, but with a check for the pin (in this case 26) going low (ie, connected to ground).
We send the data to the HID device, being careful to send the correct modifier bits, plus the encoded six bytes for the key press we wish to emulate.
Get the full code at this Gist here.
import time
import RPi.GPIO as GPIO

# We are going to use the BCM numbering
GPIO.setmode(GPIO.BCM)

# Set pin 26 as input using pull up resistor
GPIO.setup(26, GPIO.IN, pull_up_down=GPIO.PUD_UP)


# function to send the data
def write_report(report):
    with open('/dev/hidg0', 'rb+') as fd:
        fd.write(report.encode())

# infinite loop to check the pins and send data
while True:
    if not(GPIO.input(26)):

        # shift-cmd-5
        shift_cmd_5 = str(0b01010000) + "\0\x22\0\0\0\0\0"
        write_report(shift_cmd_5)
        print("SNAP!!")
        time.sleep(0.2)
        write_report("\0\0\0\0\0\0\0\0")