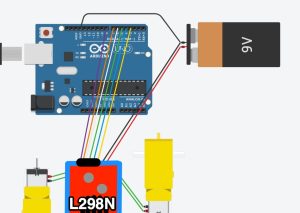
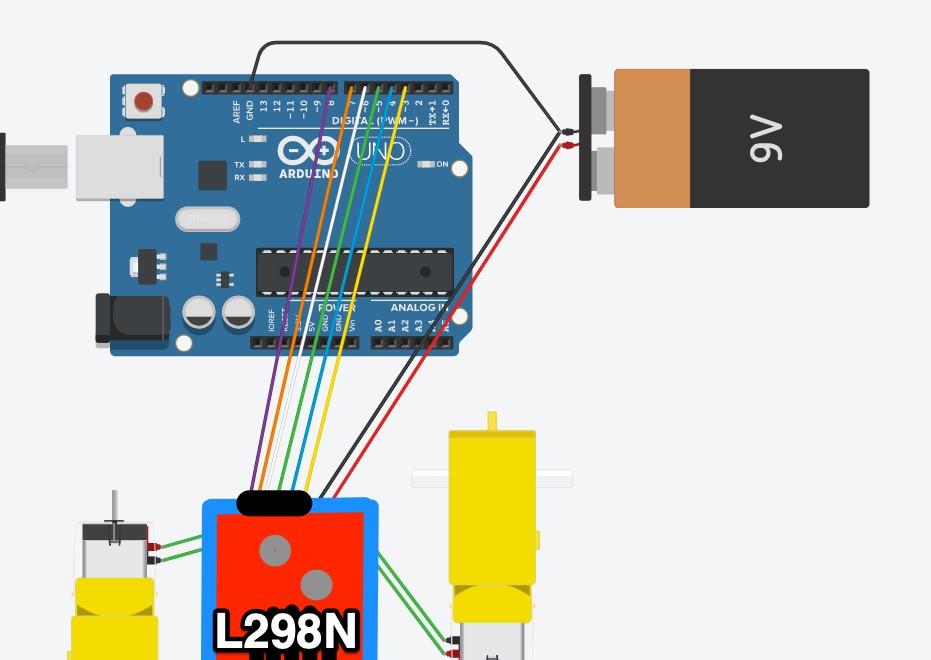
In this lesson we add a second motor, which allows us to change direction using what are often called “tank turns”.
The way this works is, if you want to go forward or back then both motors work in the same direction. When you turn left, your right hand motor goes forward and the left one goes backward, and the opposite for turning right.
If you want to get extra fancy then instead of turning in place, you can make one side go slow and the other fast so you still have forward motion but one side overtakes the other.
Note that now we have more than just f and r that we make the string we get from serial into lower case. This means we don’t have to check for both ‘F’ and ‘f’ in our if statements!
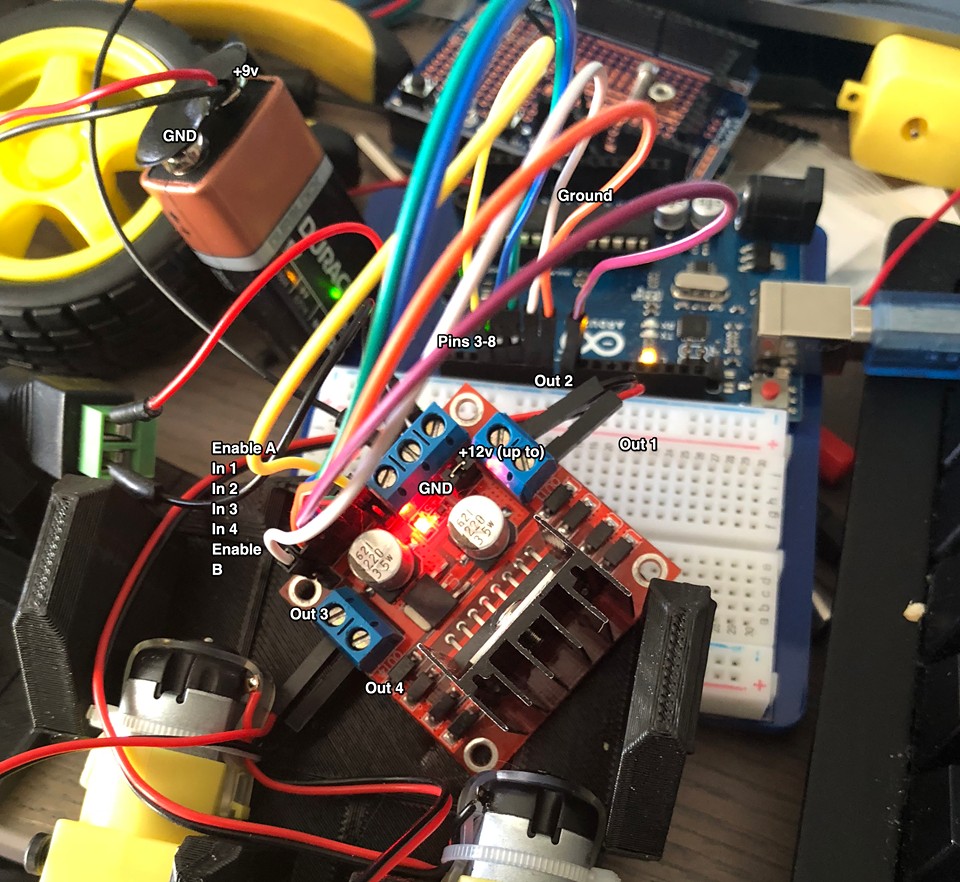
As before, in my case I have both grounds plugged into the GND on the motor driver board, but you can also ensure the grounds are connected by using the breadboard.
Code
Serial Monitor settings: in the Arduino IDE, open the Serial Monitor, set the speed to 115200 baud and the line ending to “Carriage return”, then type f (forward), b (back), l (left) or r (right), a comma and a speed from 0 to 255, such as f,200, and press Enter. Anything else stops the motors.
/*

 In this sketch we control a motor using
 the L298N H-Bridge breakout.

 We use pins 3 to 8 for this example.

 */


// input pins

// these control direction for motor A
int pin1A = 4;
int pin2A = 5;

// these control direction for motor B
int pin1B = 7;
int pin2B = 8;

// set on/off and speed
int enablepinA = 3;
int enablepinB = 6;

// how much power to send
int power = 0;

// set things up ...
void setup() {

 // start the serial connection
 Serial.begin(115200);

 // tell us we are starting
 Serial.println("Starting ...");

 // declare both pins for each motor
 // to be output:
 pinMode(pin1A, OUTPUT);
 pinMode(pin2A, OUTPUT);
 pinMode(pin1B, OUTPUT);
 pinMode(pin2B, OUTPUT);


 // enable pin is also output
 pinMode(enablepinA, OUTPUT);
 pinMode(enablepinB, OUTPUT);
}

// keep doing this forever:
void loop() {

 // play with the power setting to see
 // the effects
 while (Serial.available() > 0) {

   // 'F'orward, 'L'eft, 'R'ight or 'B'ackwards; anything else stops
   String direction = Serial.readStringUntil(',');
   direction.trim(); // ignore any stray newline from the Serial Monitor

   // Convert to lower case so we don't have to check
   // for upper and lower case commands
   direction.toLowerCase();

   // look for the next power number in the serial monitor
   // turn it into an integer and place in our power variable:
   int power = Serial.parseInt();

   // look for the carriage return (Enter)
   if (Serial.read() == '\r') {

     // report back the number we were provided:
     Serial.print(power);

     if(direction == "f") {
        forward(power);

     } else if (direction == "r") {
        right(power);

     } else if (direction == "l") {
        left(power);

     } else if (direction == "b") {
        back(power);

     } else {
        // anything else (a typo, say) stops rather than guessing
        stop();
     }
     // output text to say we got it
     Serial.println(" - Roger!");
   }
  }
}
// Drive both motors forward
void forward(int power)
{

  digitalWrite(pin1A, LOW);
  digitalWrite(pin2A, HIGH);
  digitalWrite(pin1B, HIGH);
  digitalWrite(pin2B, LOW);

  // set the speed
  analogWrite(enablepinA, power);
  analogWrite(enablepinB, power);

}

// Drive A forward and B backward
void right(int power)
{

  digitalWrite(pin1A, LOW);
  digitalWrite(pin2A, HIGH);
  digitalWrite(pin1B, LOW);
  digitalWrite(pin2B, HIGH);

  // set the speed
  analogWrite(enablepinA, power);
  analogWrite(enablepinB, power);

}

// Drive A backward and B forwards
void left(int power)
{

  digitalWrite(pin1A, HIGH);
  digitalWrite(pin2A, LOW);
  digitalWrite(pin1B, HIGH);
  digitalWrite(pin2B, LOW);

  // set the speed
  analogWrite(enablepinA, power);
  analogWrite(enablepinB, power);

}

// Drive both motors backwards
void back(int power)
{
  digitalWrite(pin1A, HIGH);
  digitalWrite(pin2A, LOW);
  digitalWrite(pin1B, LOW);
  digitalWrite(pin2B, HIGH);

  // set the speed
  analogWrite(enablepinA, power);
  analogWrite(enablepinB, power);

}

// Stop both motors
void stop()
{
  analogWrite(enablepinA, 0);
  analogWrite(enablepinB, 0);
}