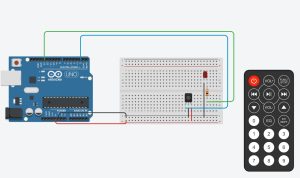
Now we bring together the Two Motors example and the IR remote/ receiver example to remote control our robot using infrared remote control.
I am using 2 for up/forward, 8 for down/backwards, 4 for left and 6 for right. 5 I am using for “stop”. You can change these easily using other button codes: the Infrared Sensor sketch prints the command code for each button, and this sketch prints any button it does not know too. It is written for version 4 of the IRremote library, which reports a short command code per button rather than the long codes older tutorials use.
Also tweak the power/speed – your input power source might not have enough current to do 255, but 125 might be too low for your motors, so see what works for your setup.
Code
/*
 Remote control our robot with an IR remote, driving two
 motors through the L298N H-Bridge breakout.

 Motor A: direction pins 4 and 5, speed (enable) pin 3
 Motor B: direction pins 7 and 8, speed (enable) pin 6
 IR receiver: signal to pin 2, plus 5V and GND.

 Written for version 4 of the IRremote library. The button
 codes are for the common 21-key "Car MP3" remote; run the
 Infrared Sensor lesson's sketch to find the codes for yours.
*/

#include <IRremote.hpp>

// Connect pin 2 on the Uno to the signal pin on the IR receiver
#define RECV_PIN 2

// these control direction for motor A
int pin1A = 4;
int pin2A = 5;

// these control direction for motor B
int pin1B = 7;
int pin2B = 8;

// set on/off and speed
int enablepinA = 3;
int enablepinB = 6;

// how much power to send (0 to 255)
int power = 255;

// set things up ...
void setup() {

  // start the serial connection
  Serial.begin(115200);

  // tell us we are starting
  Serial.println("Starting ...");

  // declare both pins for each motor
  // to be output:
  pinMode(pin1A, OUTPUT);
  pinMode(pin2A, OUTPUT);
  pinMode(pin1B, OUTPUT);
  pinMode(pin2B, OUTPUT);

  // enable pin is also output
  pinMode(enablepinA, OUTPUT);
  pinMode(enablepinB, OUTPUT);

  // Start the receiver, flashing the built-in LED
  // (pin 13) whenever a signal arrives
  IrReceiver.begin(RECV_PIN, ENABLE_LED_FEEDBACK);
}

// keep doing this forever:
void loop() {

  // If we get a burst of IR, decode it
  if (IrReceiver.decode()) {

    // Holding a button sends "repeat" codes; act on
    // the first press only
    if (!(IrReceiver.decodedIRData.flags & IRDATA_FLAGS_IS_REPEAT)) {

      // Decide action based on the button's command code
      switch (IrReceiver.decodedIRData.command) {

        // #2 = Forward
        case 0x18:
          Serial.println("REMOTE 2: forward");
          forward(power);
          break;

        // #4 = Left
        case 0x08:
          Serial.println("REMOTE 4: left");
          left(power);
          break;

        // #5 = Stop
        case 0x1C:
          Serial.println("REMOTE 5: stop");
          stop();
          break;

        // #6 = Right
        case 0x5A:
          Serial.println("REMOTE 6: right");
          right(power);
          break;

        // #8 = Backwards
        case 0x52:
          Serial.println("REMOTE 8: back");
          back(power);
          break;

        // Otherwise show what we got, so you can
        // add more buttons
        default:
          Serial.print("Unknown button: ");
          IrReceiver.printIRResultShort(&Serial);
          break;
      }
    }

    // Receive the next IR value
    IrReceiver.resume();
  }
}

// Drive both motors forward
void forward(int power)
{
  digitalWrite(pin1A, LOW);
  digitalWrite(pin2A, HIGH);
  digitalWrite(pin1B, HIGH);
  digitalWrite(pin2B, LOW);

  // set the speed
  analogWrite(enablepinA, power);
  analogWrite(enablepinB, power);
}

// Drive A forward and B backward
void right(int power)
{
  digitalWrite(pin1A, LOW);
  digitalWrite(pin2A, HIGH);
  digitalWrite(pin1B, LOW);
  digitalWrite(pin2B, HIGH);

  // set the speed
  analogWrite(enablepinA, power);
  analogWrite(enablepinB, power);
}

// Drive A backward and B forwards
void left(int power)
{
  digitalWrite(pin1A, HIGH);
  digitalWrite(pin2A, LOW);
  digitalWrite(pin1B, HIGH);
  digitalWrite(pin2B, LOW);

  // set the speed
  analogWrite(enablepinA, power);
  analogWrite(enablepinB, power);
}

// Drive both motors backwards
void back(int power)
{
  digitalWrite(pin1A, HIGH);
  digitalWrite(pin2A, LOW);
  digitalWrite(pin1B, LOW);
  digitalWrite(pin2B, HIGH);

  // set the speed
  analogWrite(enablepinA, power);
  analogWrite(enablepinB, power);
}

// Stop both motors
void stop()
{
  analogWrite(enablepinA, 0);
  analogWrite(enablepinB, 0);
}