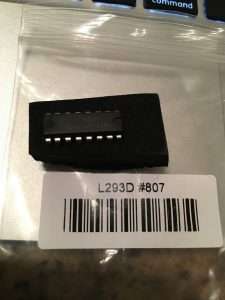
As we discussed previously, to control a DC motor with speed and direction, we need something more than to apply pulses of 5v. This is where our H-Bridge comes in, and one of the most popular is the L293D.
The L293D is reasonably cheap, easy to get a hold of, and is robust enough (600mA tolerant) for most of the projects you are going to do in the beginning. You are not going to win a professional heavy weight robot battle with this hardware, but you are going to learn a lot and have a lot of fun for the price!
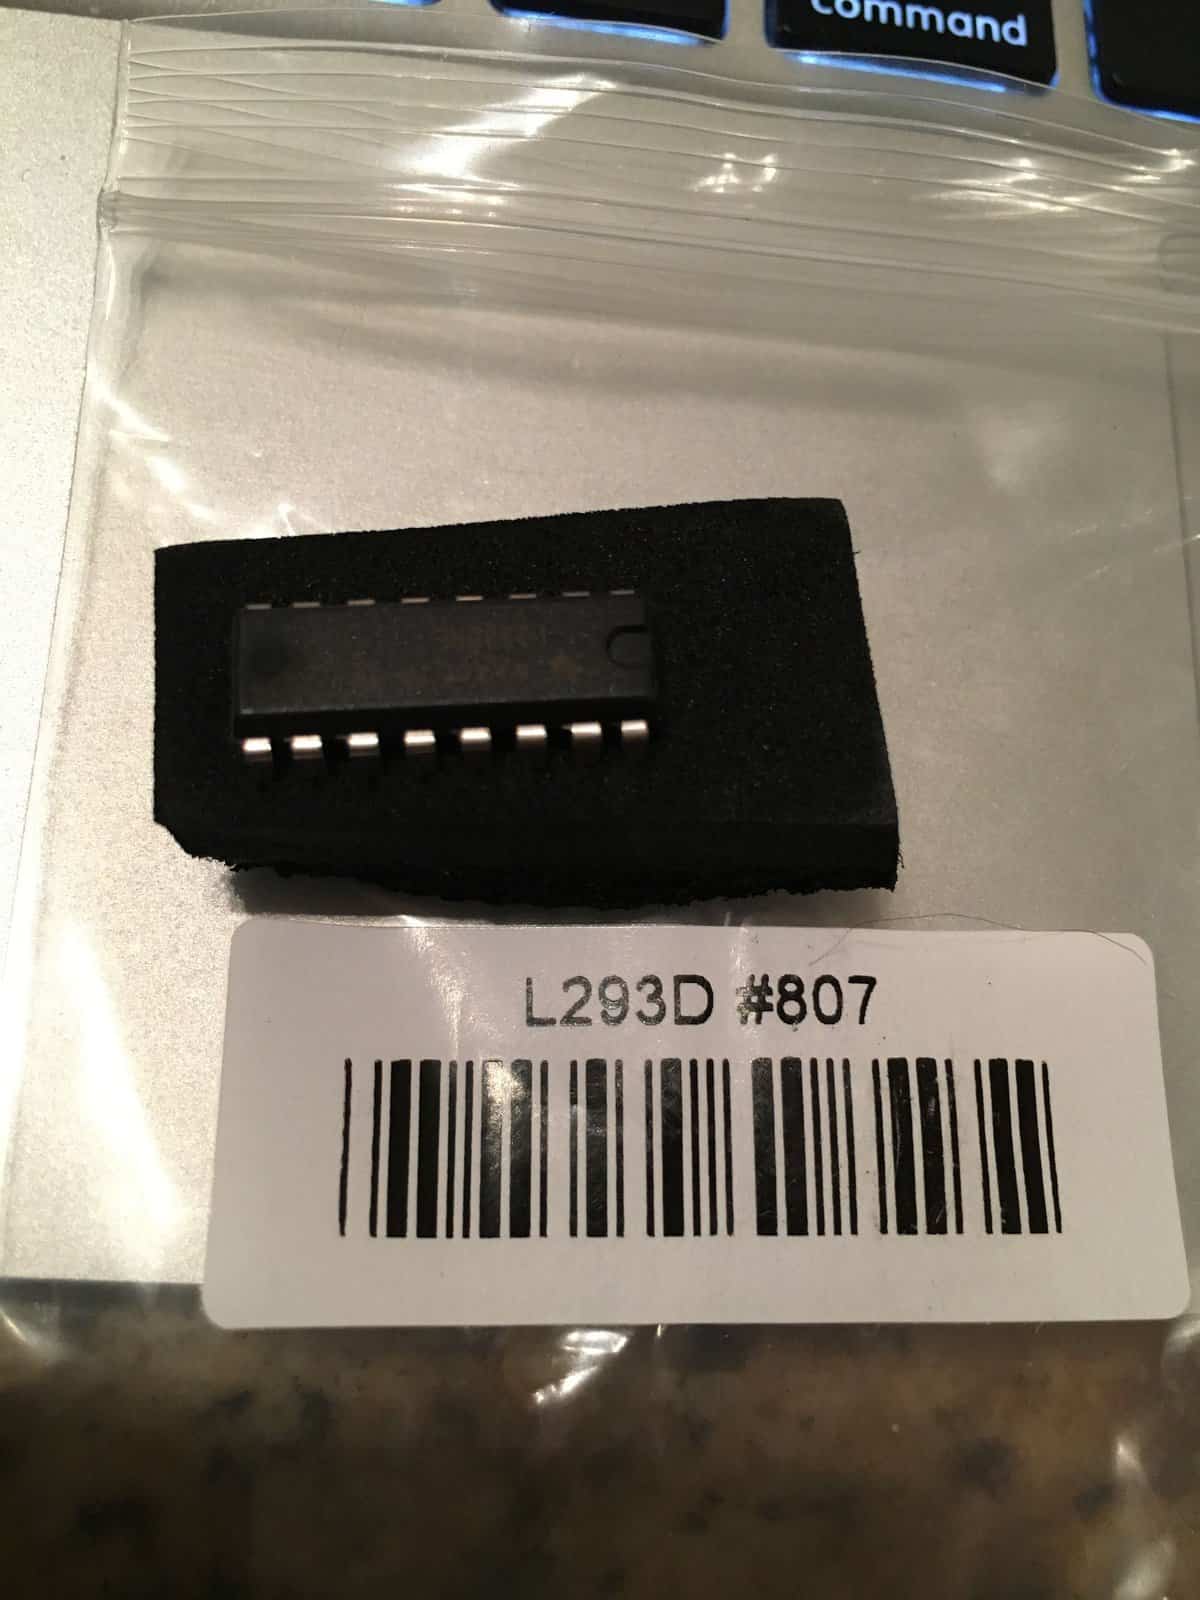
This chip has 16 pins, 8 down each side. If you place it in your breadboard with the notch facing up, the left-hand side (pins 1 to 8, top to bottom) works as follows:
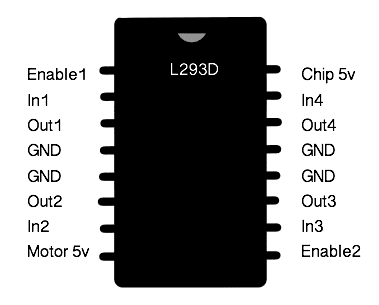
- “Enable” – This pin can be powered to turn off or on, or you can control speed with it too.
- Input Pin 1
- Output Pin 1
- Ground
- Ground
- Output Pin 2
- Input Pin 2
- VCC2, the motor supply (4.5V up to 36V, from your battery pack)
The pins have a matching set the other side, so you can run two motors with one chip. Either way you will also need to connect pin 16, VCC1, which is across from the pin 1 enable pin. That one powers the chip’s own logic and takes 5V from your Arduino. Keep the two supplies straight: 5V logic on pin 16, motor battery on pin 8, and all the grounds joined together.
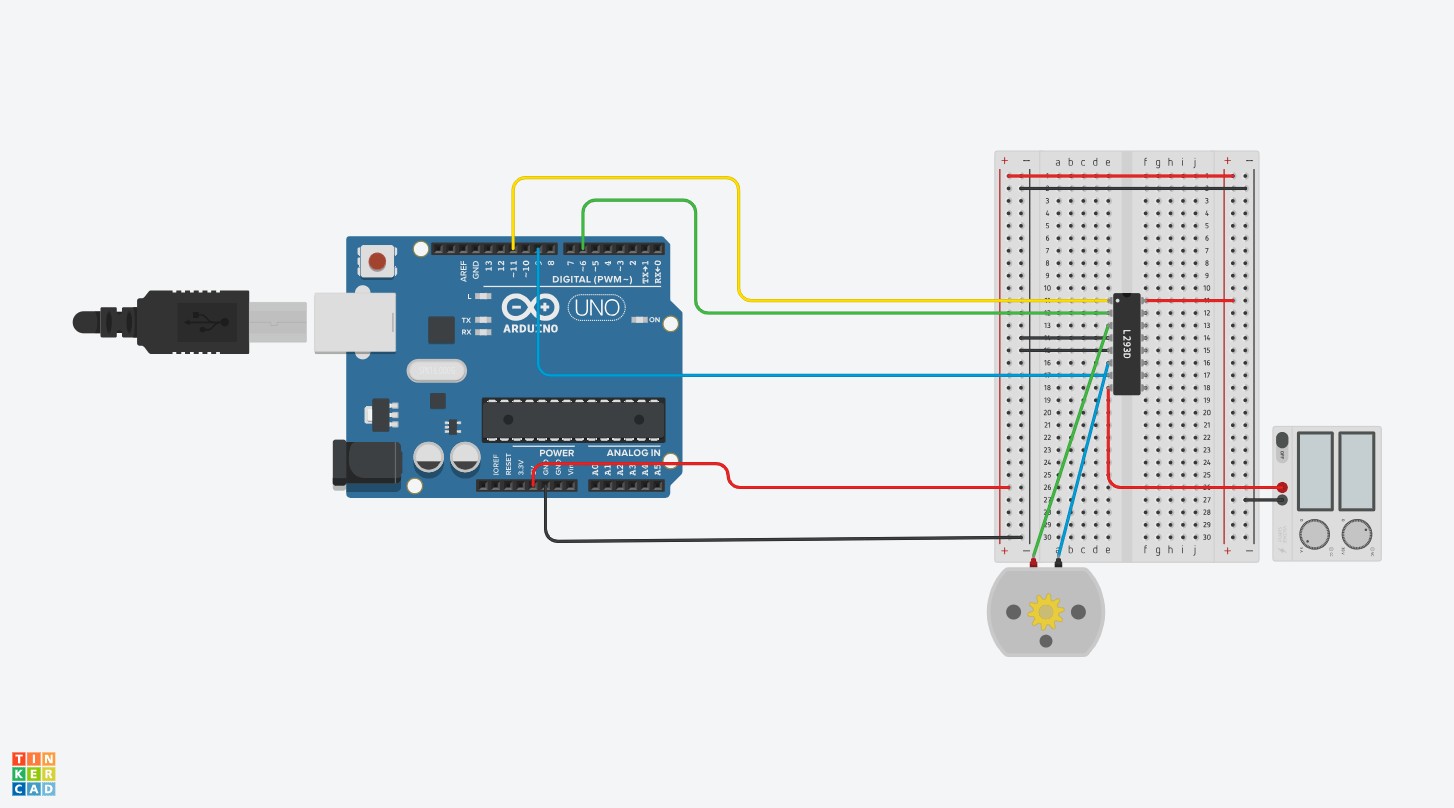
Pay close attention to the “notch” in the L293D chip (Click to zoom in)
(The video that went with this lesson is no longer available.)
Code
In this example, using the serial monitor we enter f or r for forward and reverse, followed by a comma, then the speed. So if you want to go forward and fast, you would enter “f,200”.
Serial Monitor settings: in the Arduino IDE, open the Serial Monitor, set the speed to 115200 baud and the line ending to “Carriage return”, then type f or r, a comma and a speed from 0 to 255, such as f,200, and press Enter.
/*

 In this sketch we control a motor using
 the popular L293D H-Bridge chip.

 Enter f or r, followed by a comma, then the speed (eg. 200)

 */


// input pins
int pin1 = 9;          // the pins the inputs are attached to
int pin2 = 6;

// set on/off and speed
int enablepin = 11;

int power = 0;         // how much power to send

// set things up ...
void setup() {

  // start the serial connection
  Serial.begin(115200);

  // declare both pins to be output:
  pinMode(pin1, OUTPUT);
  pinMode(pin2, OUTPUT);

  // enable pin is also output
  pinMode(enablepin, OUTPUT);

}

// keep doing this forever:
void loop() {

  // play with the power setting to see
  // the effects
  while (Serial.available() > 0) {

    // F or R
    String direction = Serial.readStringUntil(',');
    direction.trim(); // ignore any stray newline from the Serial Monitor

    // look for the next power number in the serial monitor
    // turn it into an integer and place in our power variable:
    int power = Serial.parseInt();

    // look for the carriage return (Enter)
    if (Serial.read() == '\r') {

        // report back the number we were provided:
        Serial.print(power);

        if(direction == "f") {
          digitalWrite(pin1, LOW);
          digitalWrite(pin2, HIGH);

          // set the speed
          analogWrite(enablepin, power);


        } else {
          digitalWrite(pin1, HIGH);
          digitalWrite(pin2, LOW);

          // set the speed
          analogWrite(enablepin, power);
        }


        // output text to say we got it
        Serial.println(" - Roger!");
    }
  }
}