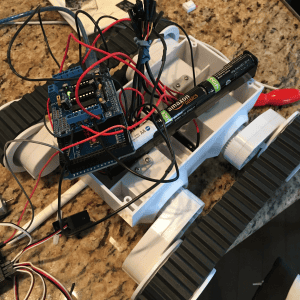
In this lesson we will look at three different types of common boards that you will see in projects:
- The cheap and cheerful eBay 28BYJ-48 stepper motors and the ULN2003 driver boards that come with them.
- L298 driver boards.
- Adafruit motor shields (and clones).
Why all three? Each have pros and cons.
Choosing the tool for your job
Steppers
The stepper choice is probably the one many people will be confused by. What you have to remember is steppers are great at predictable movements, which is why they are used in CNC/3d printers. If you want your robot to perform precisely , such as make a 30cm square, then steppers are an excellent choice.
Now the tiny steppers in the example here is not going to break speed records, but they won’t break the bank either.
Breakout Board/Module
Breakouts are small boards that you can attach to your project using wires. The benefit of this is they tend to be generic, not tied to a specific form factor, so the same breakout can be used with Arduino, NodeMCU, Raspberry Pi, and so on.
The boards we will use here are cheap eBay/Aliexpress boards based on the L298 chip from earlier, but with added power management electronics and heat sink, etc. They can drive two motors.
If you have a larger stepper motor, these boards can drive steppers too instead of two DC motors.
Since the first version of this course, a newer generation of driver breakouts has caught on, based on the TB6612FNG and DRV8833 chips. The classic L298N boards tend to be cheap and plentiful, and their big screw terminals and built-in 5V regulator make them easy to wire up, but they waste a couple of volts as heat, so a 6V battery pack leaves only around 4V for your motors. For a little more money the newer boards are tiny, run cool, lose far less voltage, and are happy with 3.3V logic from an ESP32 or Pico. They handle less current than the L298N, around 1 to 1.5A per motor rather than 2A, but that is plenty for TT gear motors and small robots like ours.
Some might say the shields are easier to use. I guess that is true, but only marginally.
Adafruit Motor Shield
I am a huge fan of using breakouts for the reasons stated above, but I have to hand it to Adafruit for designing a fantastic motor shield, and for making it Open Source Hardware so there are plenty of cheap knockoffs.
Now, I would encourage anyone who can afford it to support Adafruit by buying as much legit product as you can, because otherwise they won’t be able to continue putting out all this great stuff, but there is always a risk of frying your kit, so having cheap options is always awesome.
The Arduino shields Adafruit make not only allow 4 DC motors (or two steppers), but they also have two connectors for servos in addition to the other motors. Oh, and they provide an easy to use library too :)