• Skip to main content
  • Skip to header right navigation
  • Skip to site footer
  • YouTube
  • MakerWorld
  • Instagram
  • Threads
  • Bluesky
  • Mastodon
  • Facebook
makerhacks-logo

Maker Hacks

Ideas, news & tutorials for makers and hackers – Arduino/Raspberry Pi, 3D printing, robotics, laser cutting, and more

  • Home
  • About
  • 3D Printing
  • Laser Cutting
  • CNC
  • Programming
  • Free Arduino Course
  • Free Robotics Course
  • Recommendations

Stepper Drivers

You are here: Home / Robotics Course / Stepper Drivers

In this lesson we will drive a stepper motor, the 28BYJ-48 using the ULN2003 driver board that is usually provided with them.
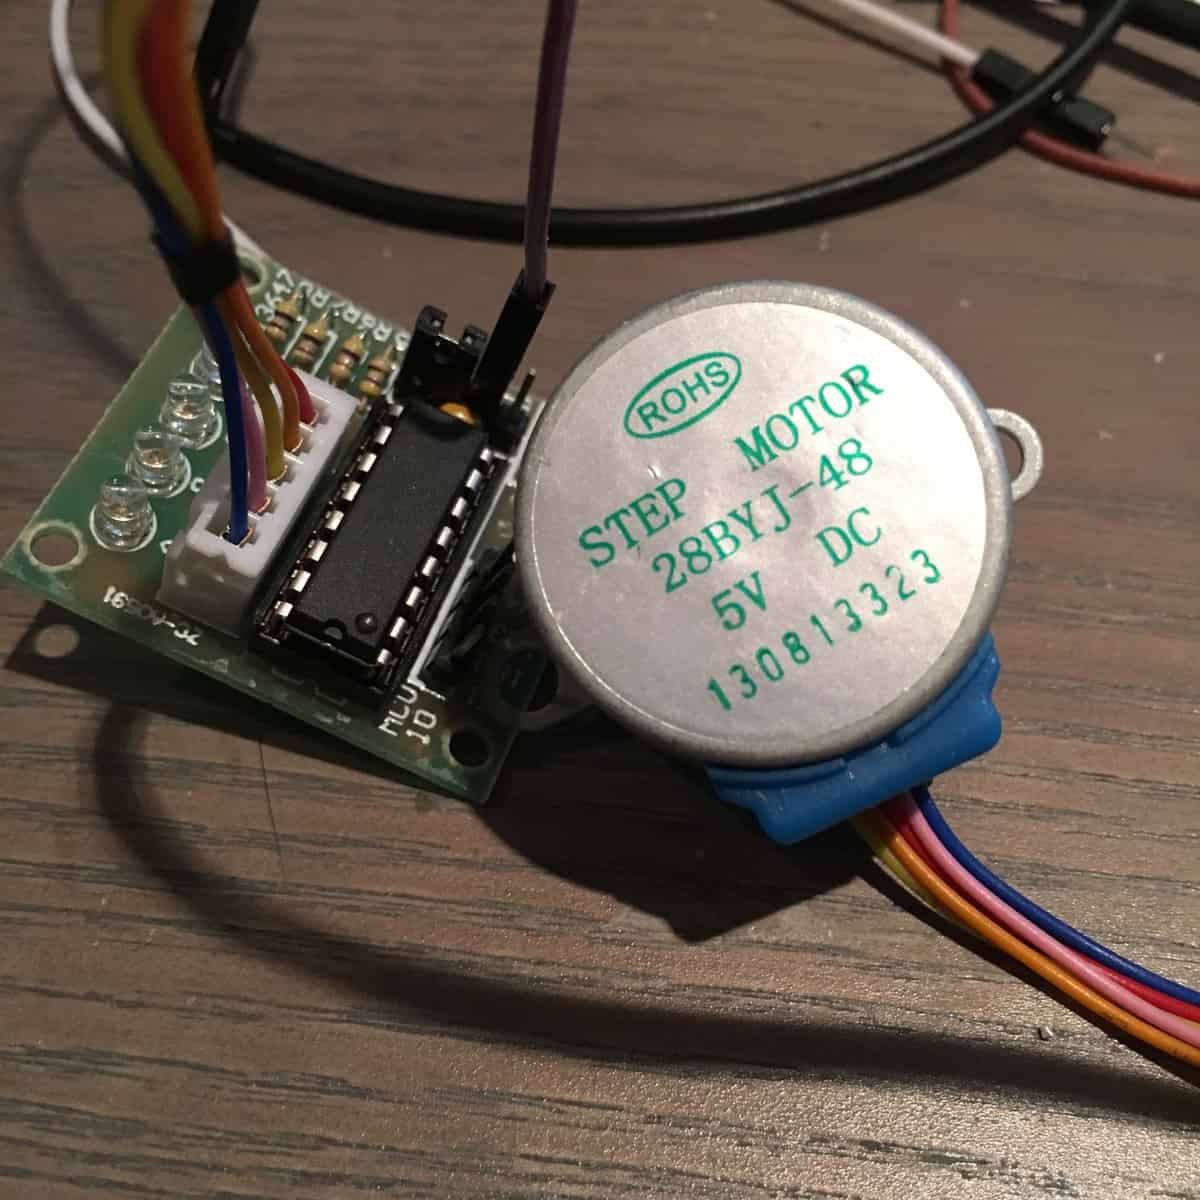
28BYJ-48 stepper

This stepper is small but remarkably strong. Originally they were used in applications such as air conditioning/HVAC, but hobbyists discovered how cheap and plentiful they were, so they became an Arduino fan favourite, and are often now included in kits.

They are 5v DC, the boards accept 5-12v, but each motor can draw up to 320mA, we will use external power attached to the 5-12v in, and ground attached to our battery pack and our Arduino.

To control the motor the stepper attaches to the driver board with 4 data lines and power. Our Arduino connects to IN1-IN4.
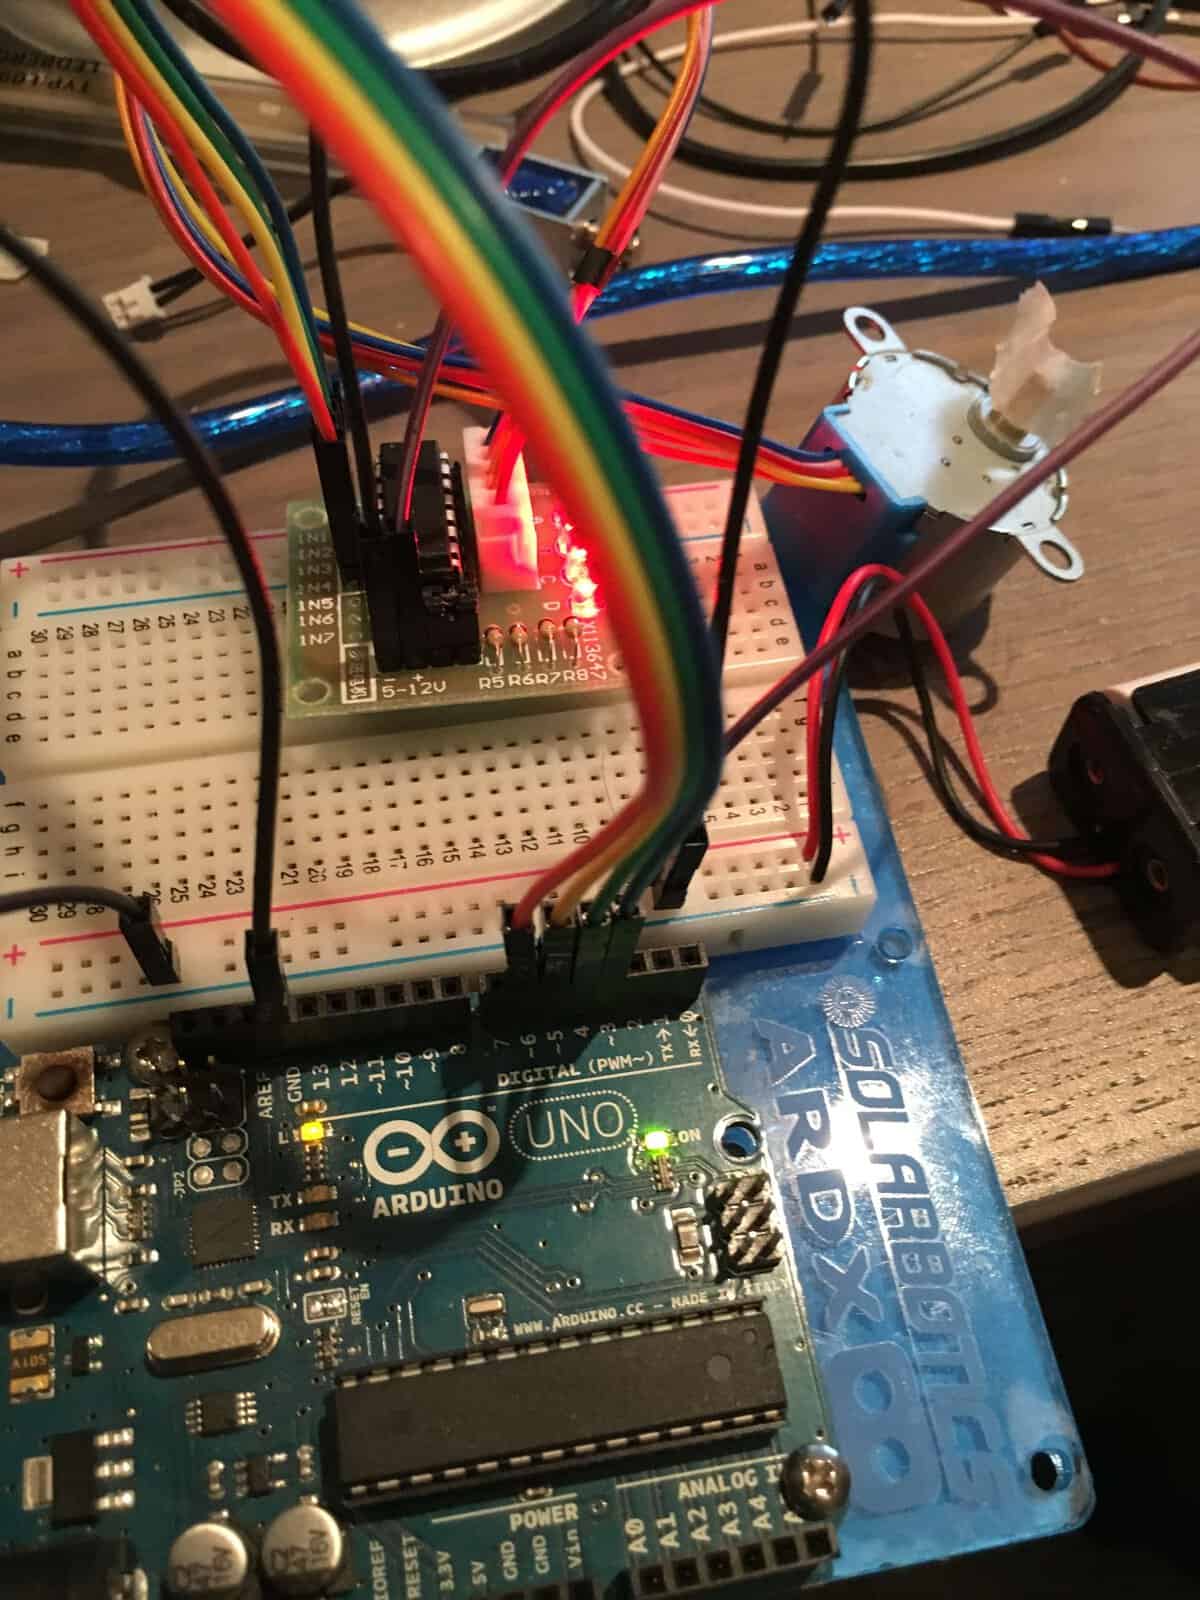
stepper connections
Click to zoom

Code

We will use the default Arduino library to drive our steppers for now.

/*
Simply use the built-in library
to drive a stepper back and forth
*/
//Arduino stepper library
#include <Stepper.h>
// steps for one full turn of the output shaft:
// 32 steps inside the motor x about 64:1 gearing
#define STEPS 2048
// connections need to be done carefully
// In1-In4 are added in the sequence 1-3-2-4
Stepper stepper(STEPS, 3, 5, 4, 6);
// the number of steps to take
int numSteps;
// No setup here
void setup() {}
// loop runs constantly
void loop() {
// we are going to do a full revolution
// (the real gear ratio is 63.68:1, so it is a hair over)
numSteps = STEPS;
// speed in RPM; these little motors top out
// around 10 to 15 RPM
stepper.setSpeed(10);
// take the steps
stepper.step(numSteps);
// pause
delay(500);
// now backwards
stepper.step(-numSteps);
// pause
delay(500);
}

Previous Using Motor Drivers, Shields and BreakoutsCourse contentsNext L298N Breakouts

Robot Course Lessons

  • Introduction
  • Choosing a Brain for your robot
  • Motors and Actuators
  • Basic Motor Controllers
  • Sensors
  • Breadboards, Batteries, Chassis, Wheels and Wires
  • Introduction
  • Basic DC Motor Movement
  • Forward and Reverse with Servos
  • Controlling DC Motors with the L293D H-Bridge Chip
  • Using Motor Drivers, Shields and Breakouts
  • Stepper Drivers
  • L298N Breakouts
  • Changing Direction with Tank Turning – L298n Breakout and Two Motors
  • Infrared Sensor
  • IR Remote Control
  • Robot Chassis
Creative Commons Attribution-ShareAlike 4.0 licence

Free to use, adapt and share. This course by Chris Garrett, Maker Hacks, is licensed under Creative Commons Attribution-ShareAlike 4.0. Workshops, schools and clubs are welcome to use it, including in your own handouts and sessions. Just credit “Chris Garrett, Maker Hacks (makerhacks.com)” with a link to the lesson, and share any adapted versions under the same licence. Embedded videos and other people’s content keep their own terms.

Improved a lesson or spotted a mistake? I would love to hear about it: get in touch.

  • 3D Printing
  • CNC
  • Electronics and Hardware
  • Laser Cutting
  • News and Reviews
  • Software and Programming

arduino budget cad cnc diode laser glowforge Hacks Ideas laser cutter linux Makes making python raspberry pi resin Reviews technology tips xTool Lasers

  • YouTube
  • MakerWorld
  • Instagram
  • Threads
  • Bluesky
  • Mastodon
  • Facebook

.

Maker Hacks Blog Copyright © 2026 · All Rights Reserved · Privacy Policy